.png)
Customizing your Calendar
What Is a Calendar Widget?
A calendar widget is a scheduling tool you can embed on your website or share via link so contacts can book time with you. It works similarly to tools like Calendly or TidyCal, while staying fully connected to your AccountGroove CRM.
Calendar customization allows you to control both appearance and behavior so your booking experience feels seamless and professional.
Calendar Widget Customization is designed to give you control over the appearance and functionality of your widget. With this powerful feature, you can personalize your widget according to your preferences, making it uniquely yours.
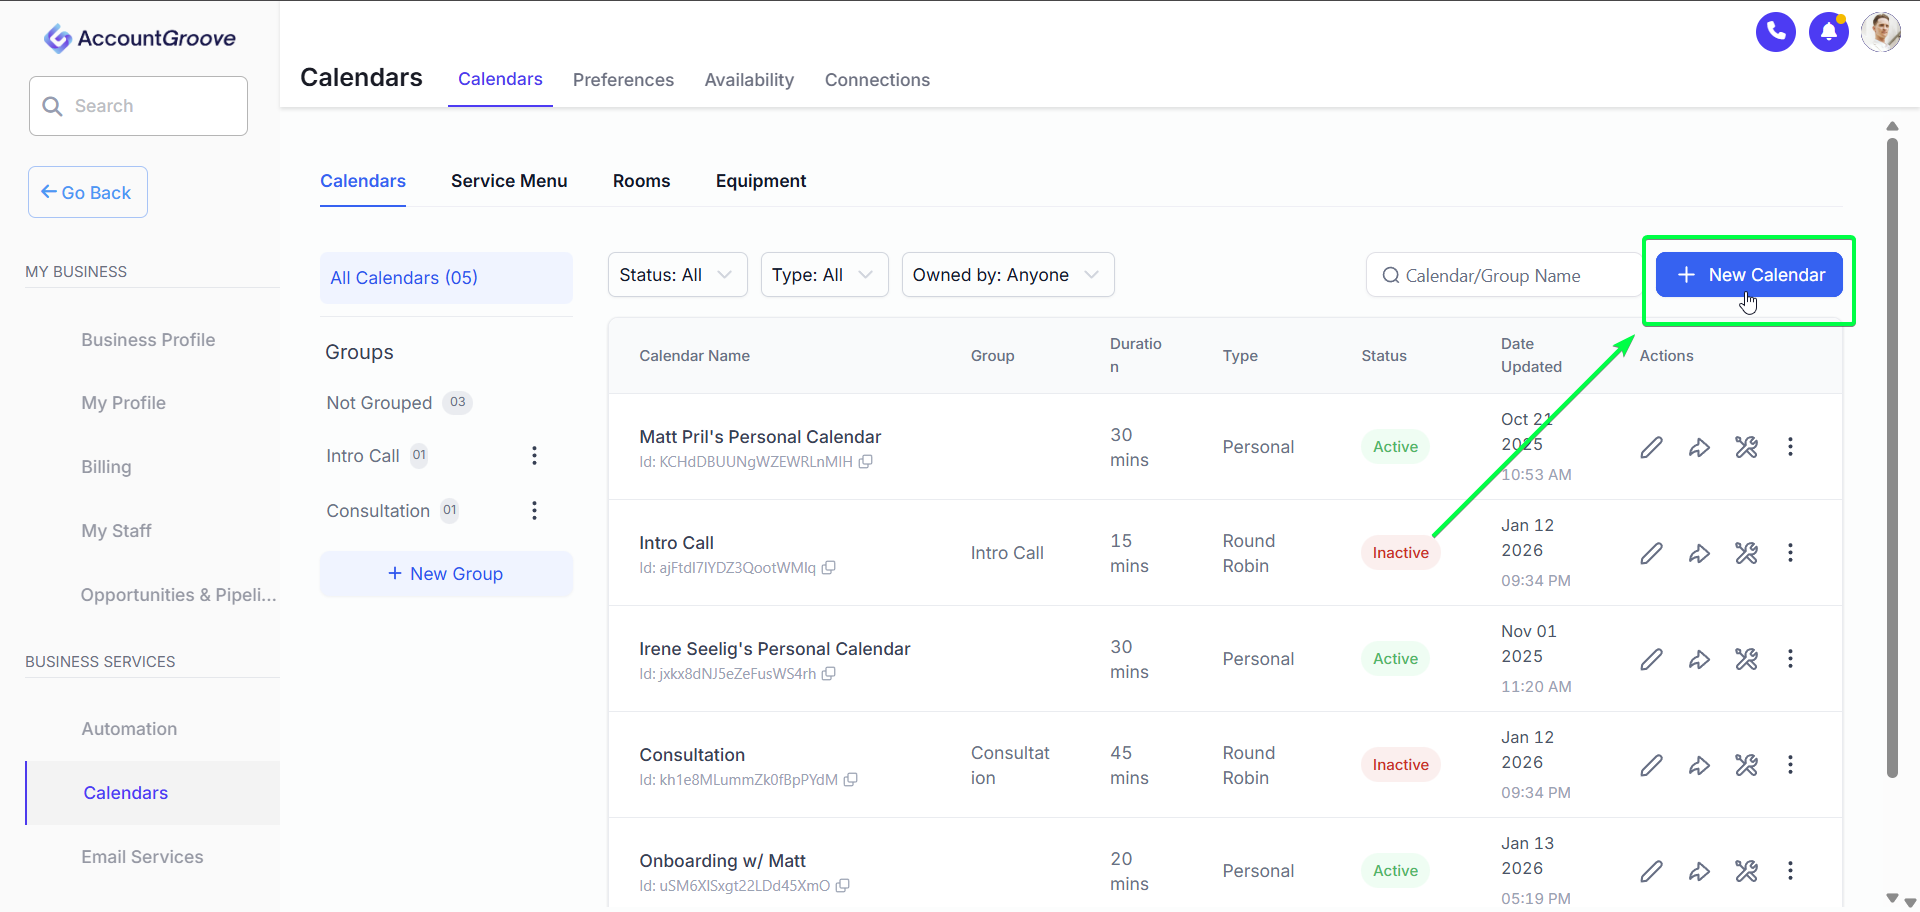
Step 1: Access Calendars
- From the left sidebar, go to Settings
- Select Calendars
- Click New Calendar in the top right corner


NOTE: Before creating your first calendar make sure to update your Calendar Preferences.
Click New Calendar in the top right corner
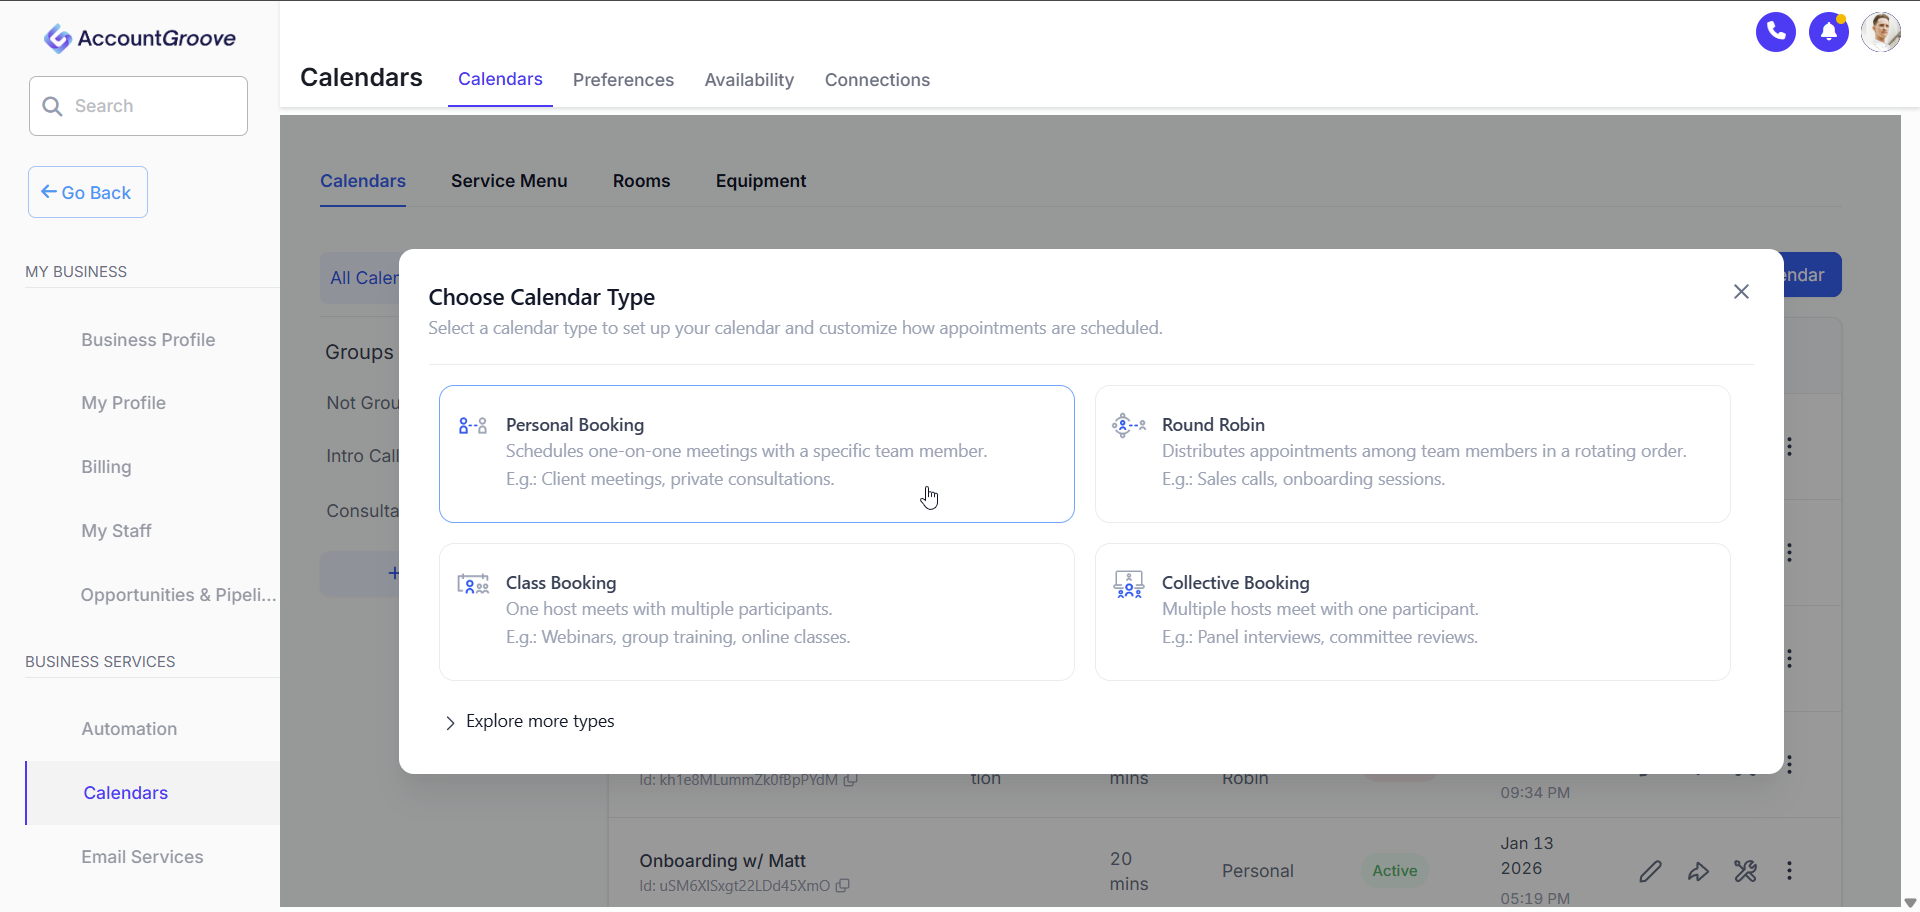
Step 2: Choose a Calendar Type
Select the type of calendar you want to create:
-
Personal Booking
Best for 1:1 meetings like discovery calls or consultations
-
Round Robin
Automatically rotates bookings across multiple team members
-
Class Booking
Allows multiple attendees to book the same time slot
-
Collective Booking
Requires multiple team members to be available at once
For this example we will use Personal Booking
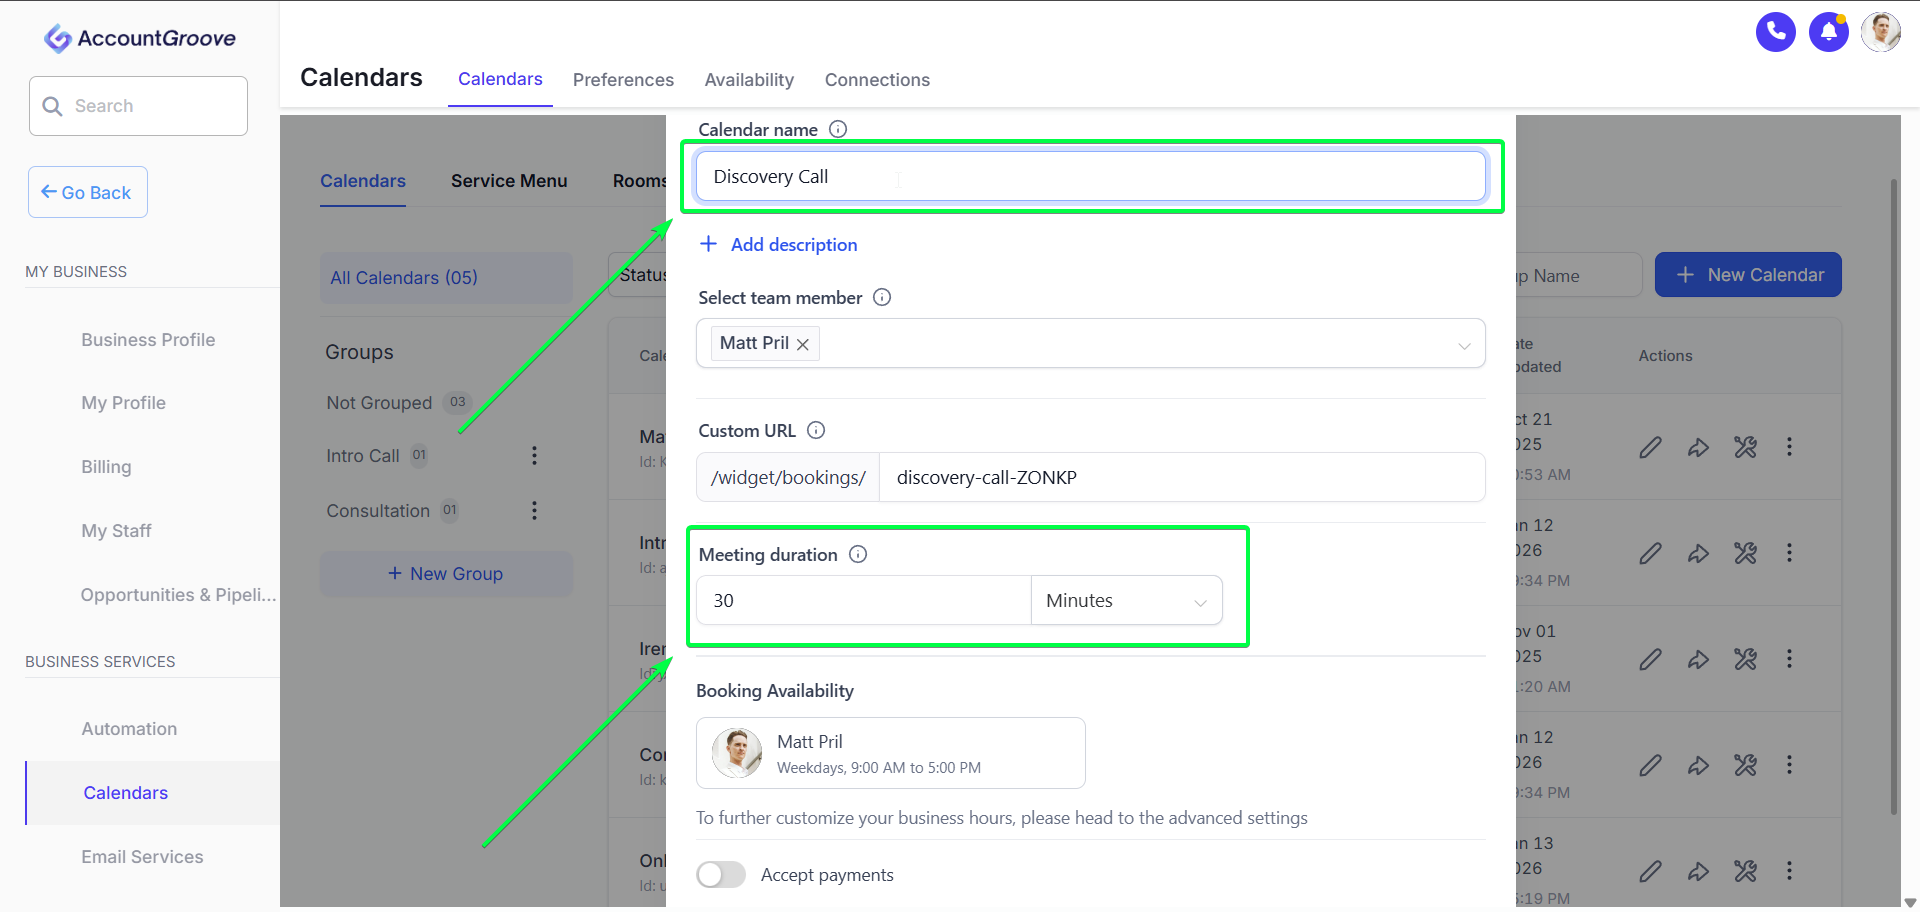
Step 3: Set Basic Calendar Details
Enter the core information for your calendar:
-
Calendar Name
Example: Discovery Call
-
Assigned User or Team
Determines who receives the booking
-
Meeting Duration
Example: 15, 30, or 60 minutes
Click Save to continue.
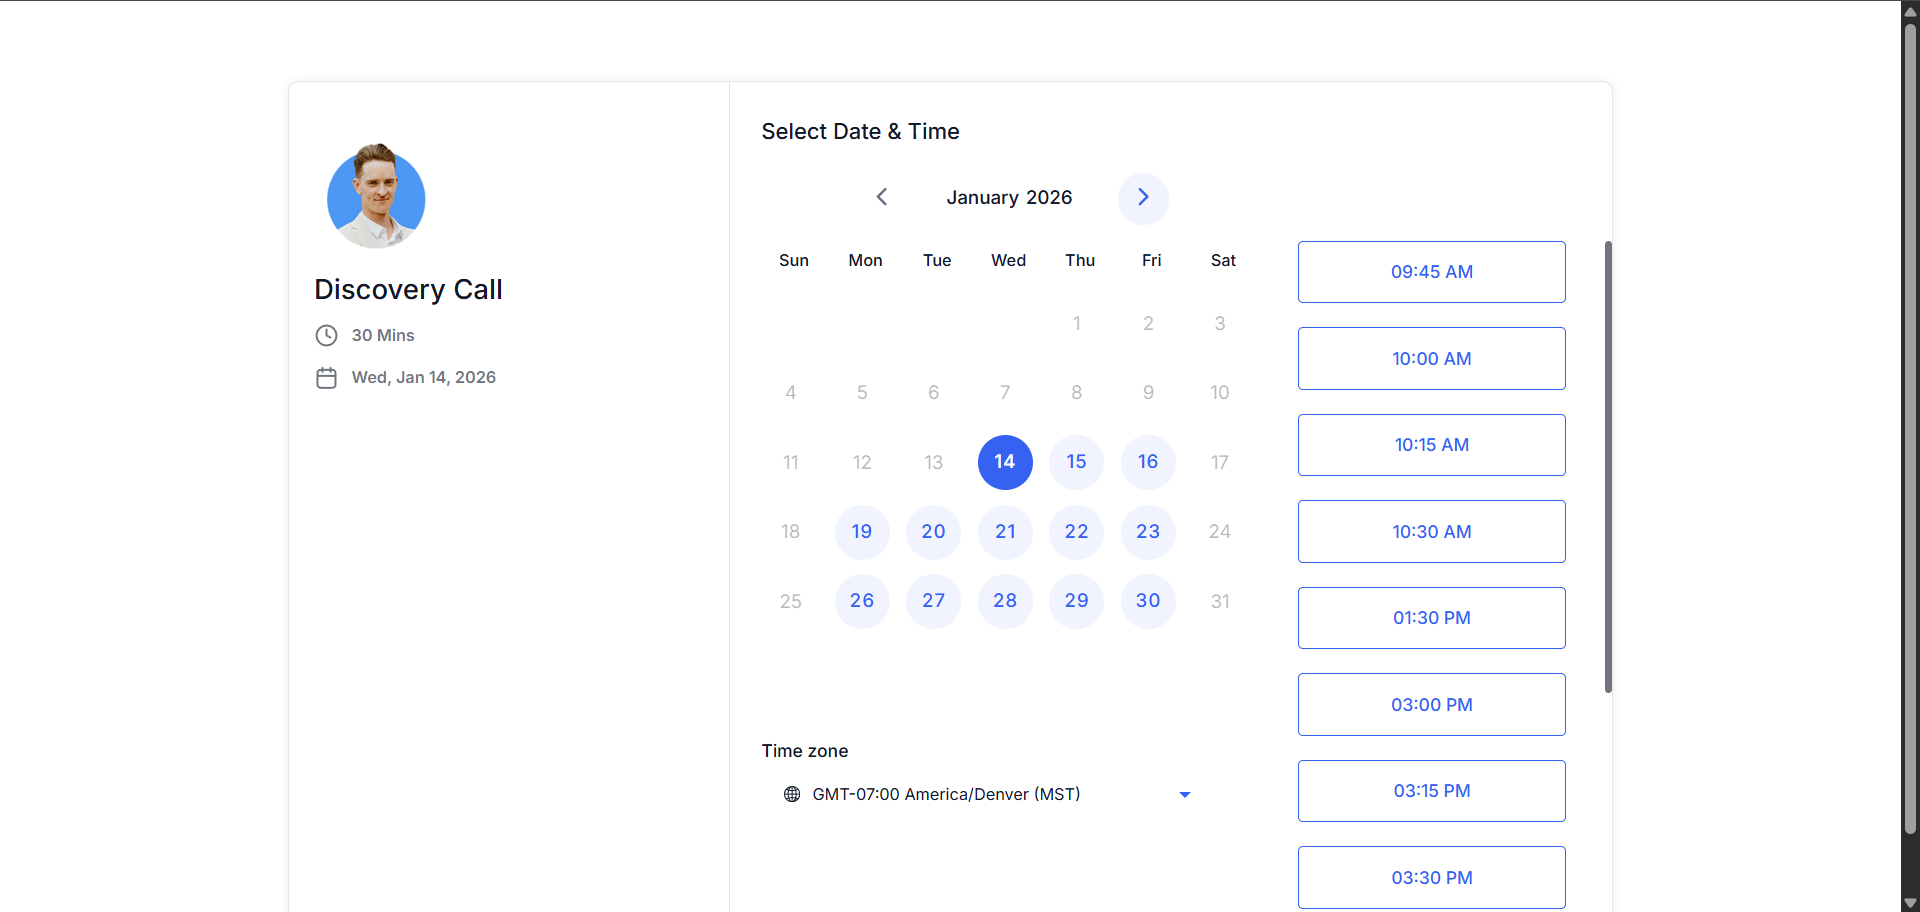
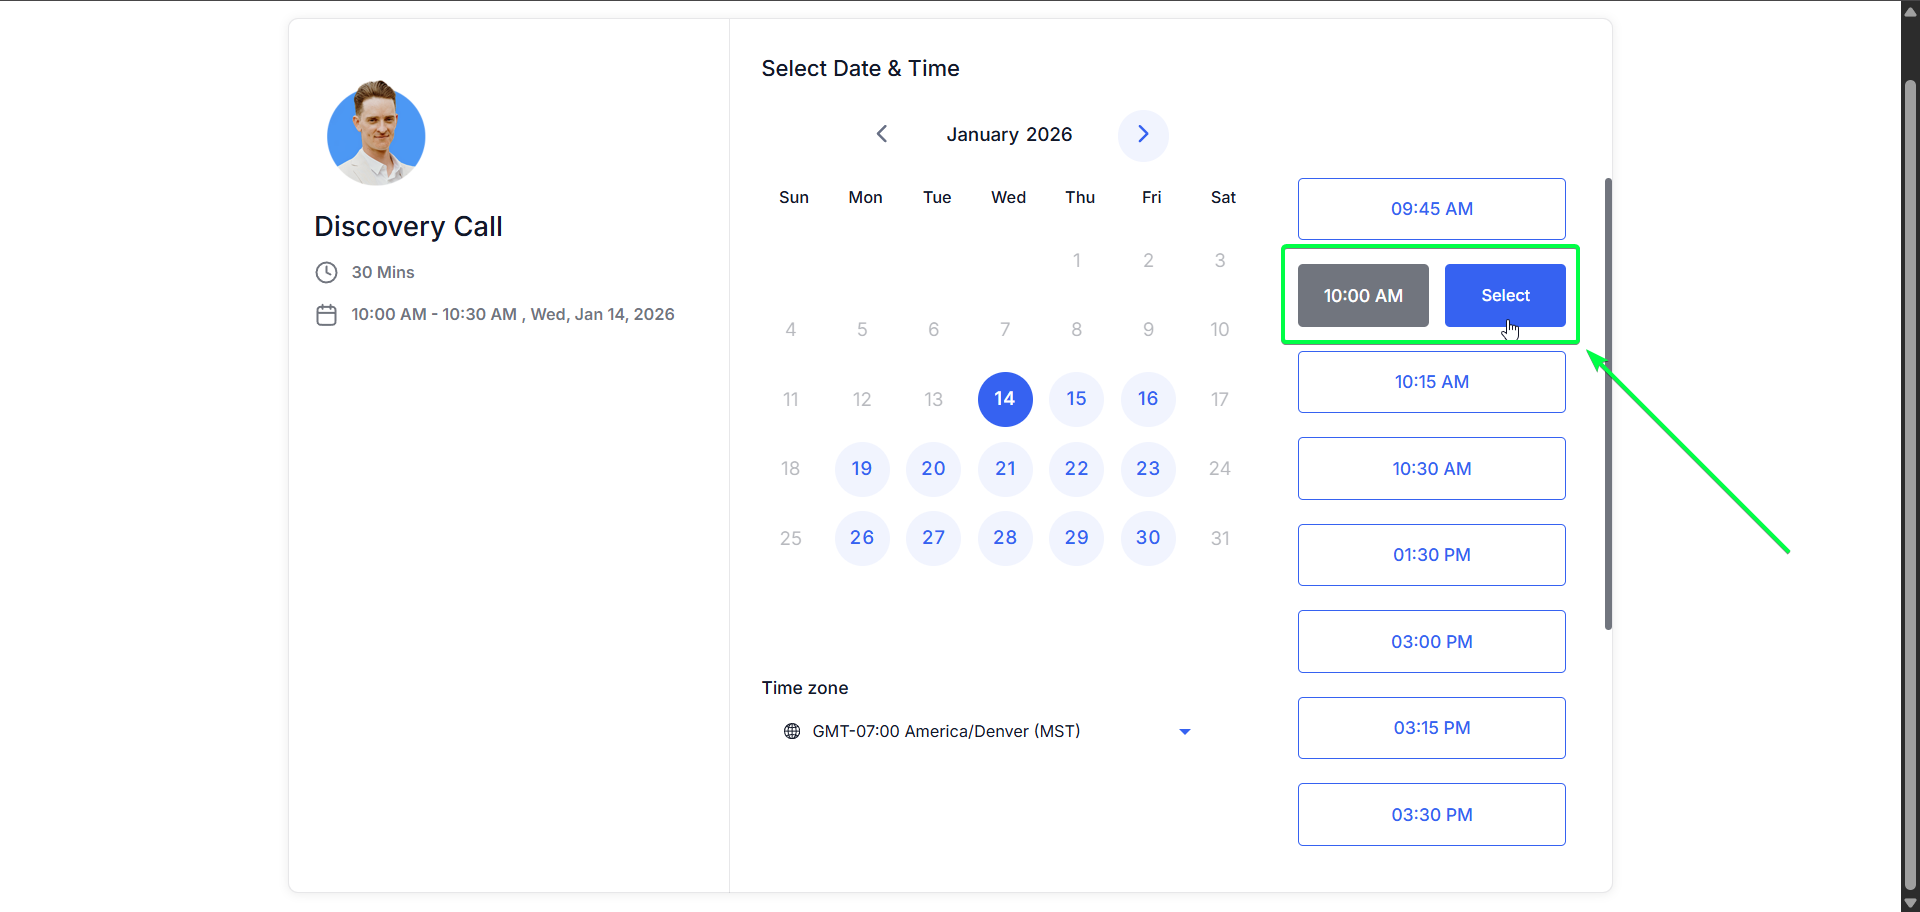
You can now preview your Calendar widget!

Step 4: Customize Additional Calendar Settings
After saving, return to calendar settings and Edit the recently created calendar.
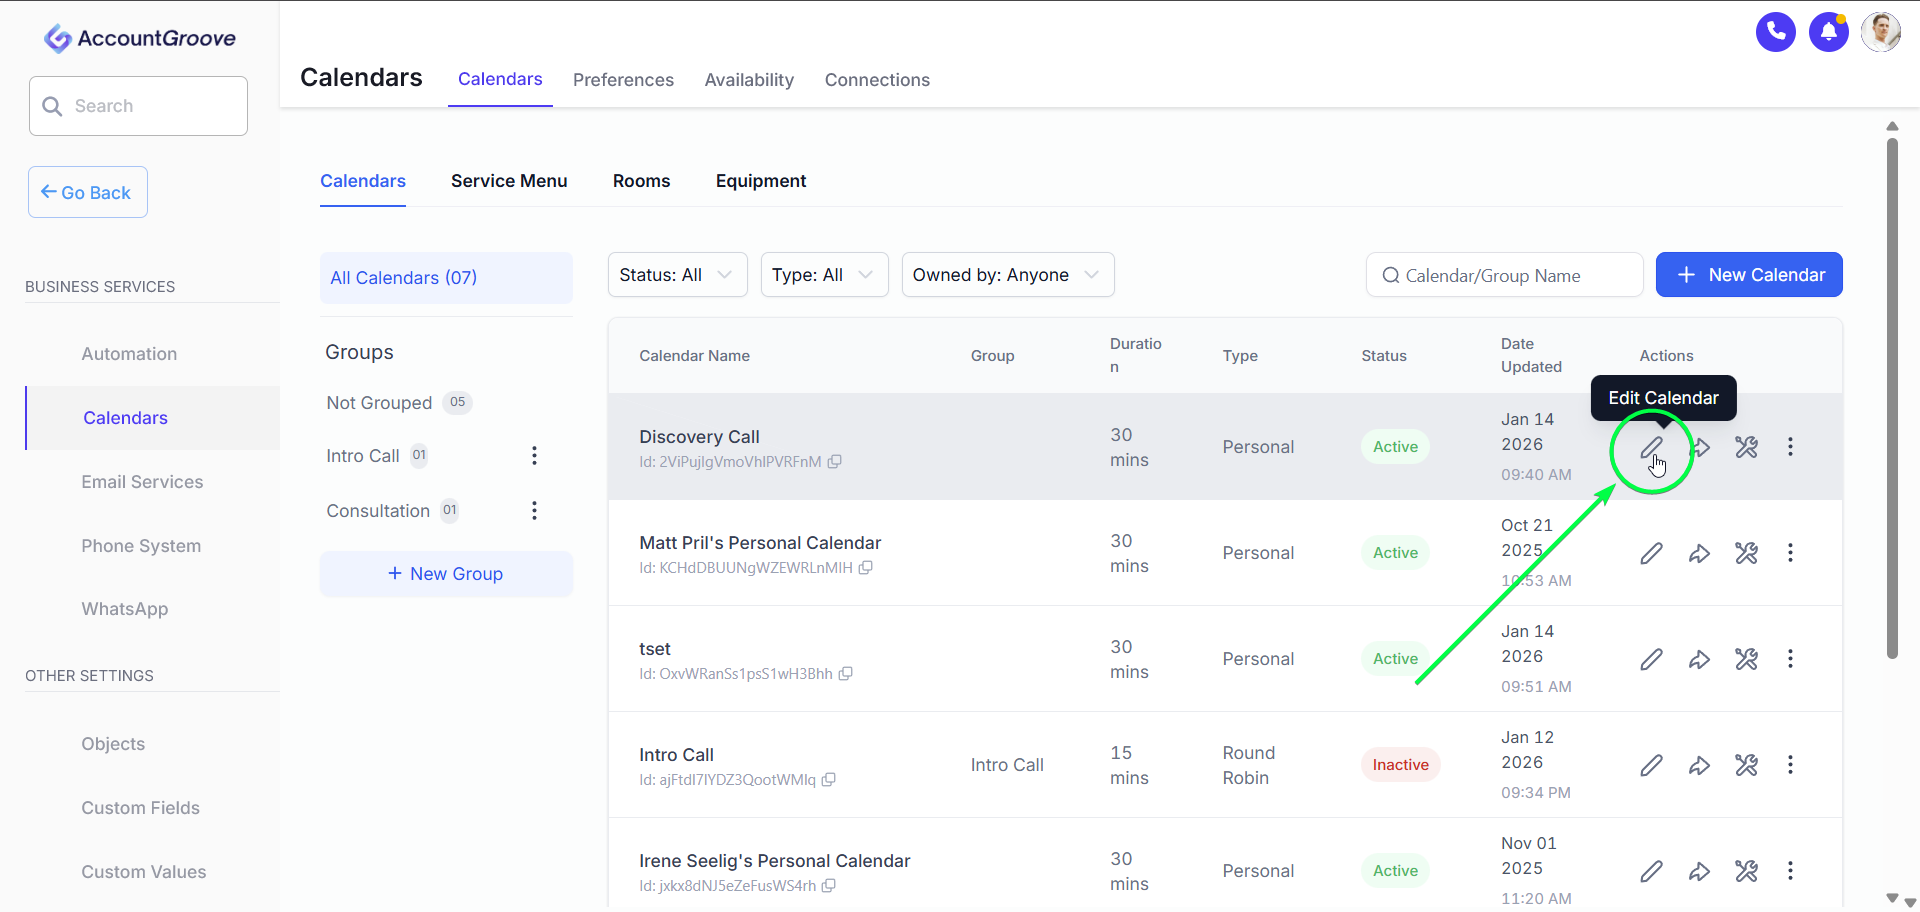
Use the left menu to configure each section.
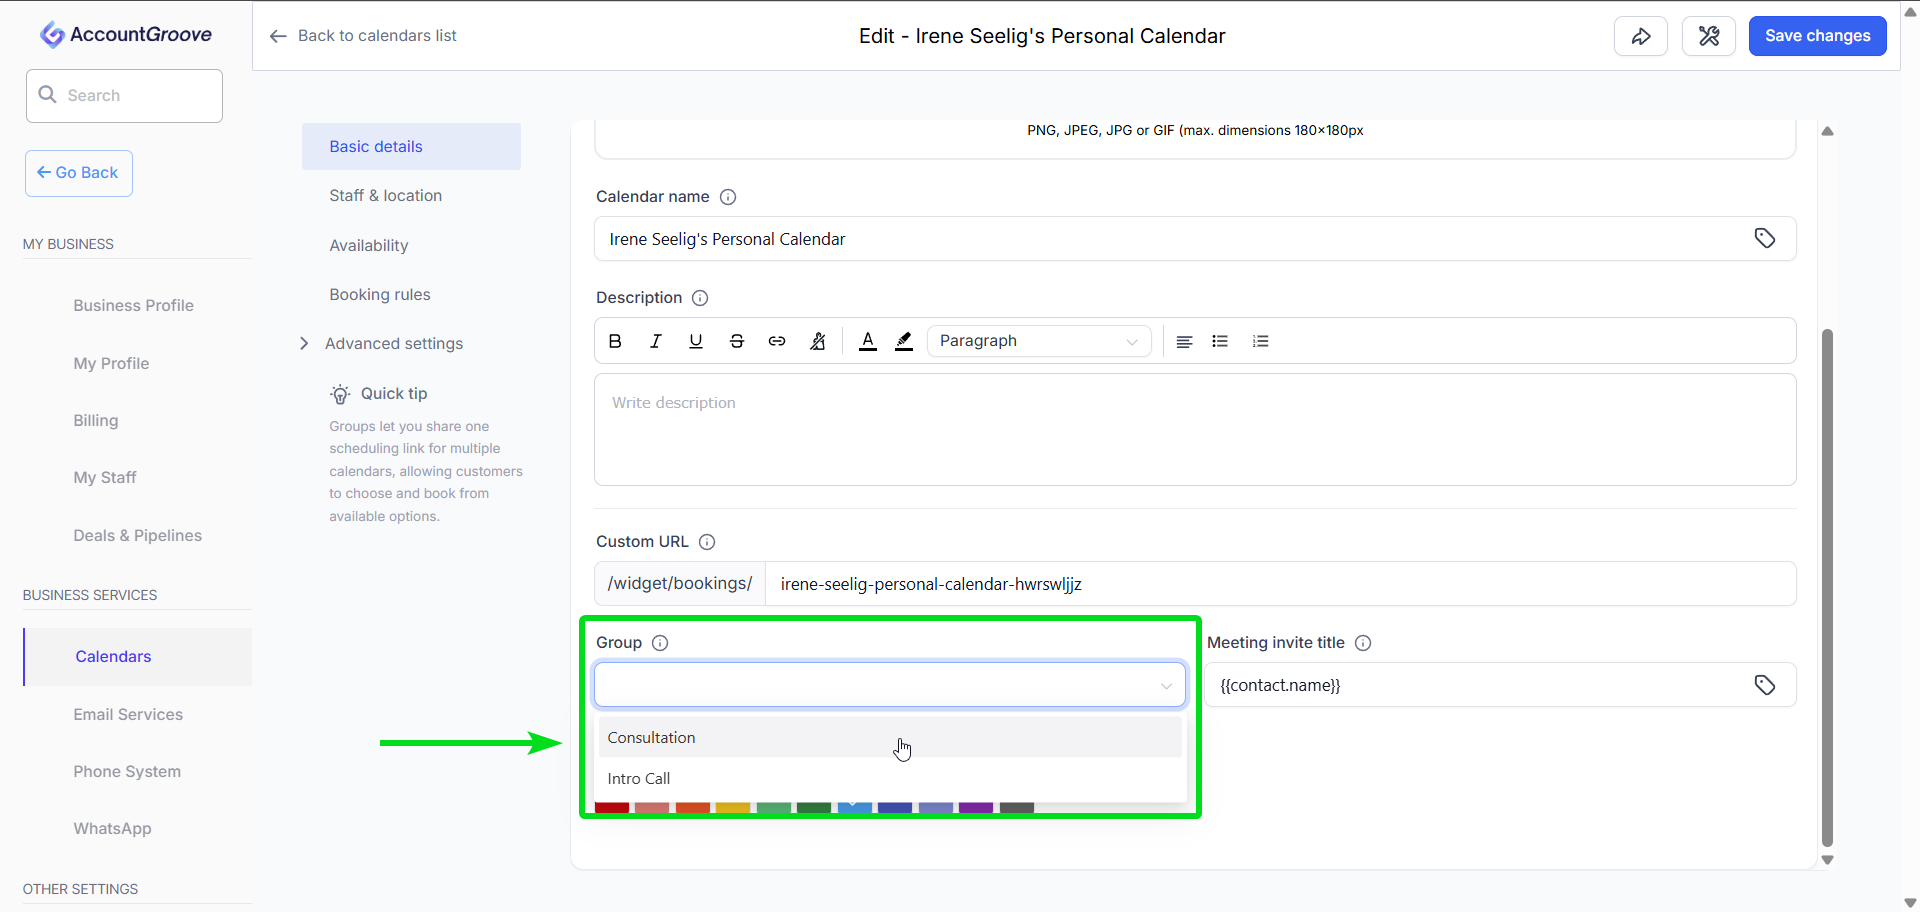
Important: Make sure to Group your calls into either Intro Call or Consultation. This will connect your calendar to the correct automations.
Availability & Booking Rules
Control when and how people can book time with you:
- Available days and hours
- Lead time required before booking
- Minimum and maximum scheduling notice
- Daily booking limits
- Buffer time before and after meetings
These rules help prevent back to back meetings and last minute bookings.

Forms & Fields
Customize what information is collected when someone books:
- Add or remove form fields
- Make fields required or optional
- Reorder questions
- Enable multi step booking forms
- Customize confirmation and thank you messages
All form responses are saved directly to the contact record.
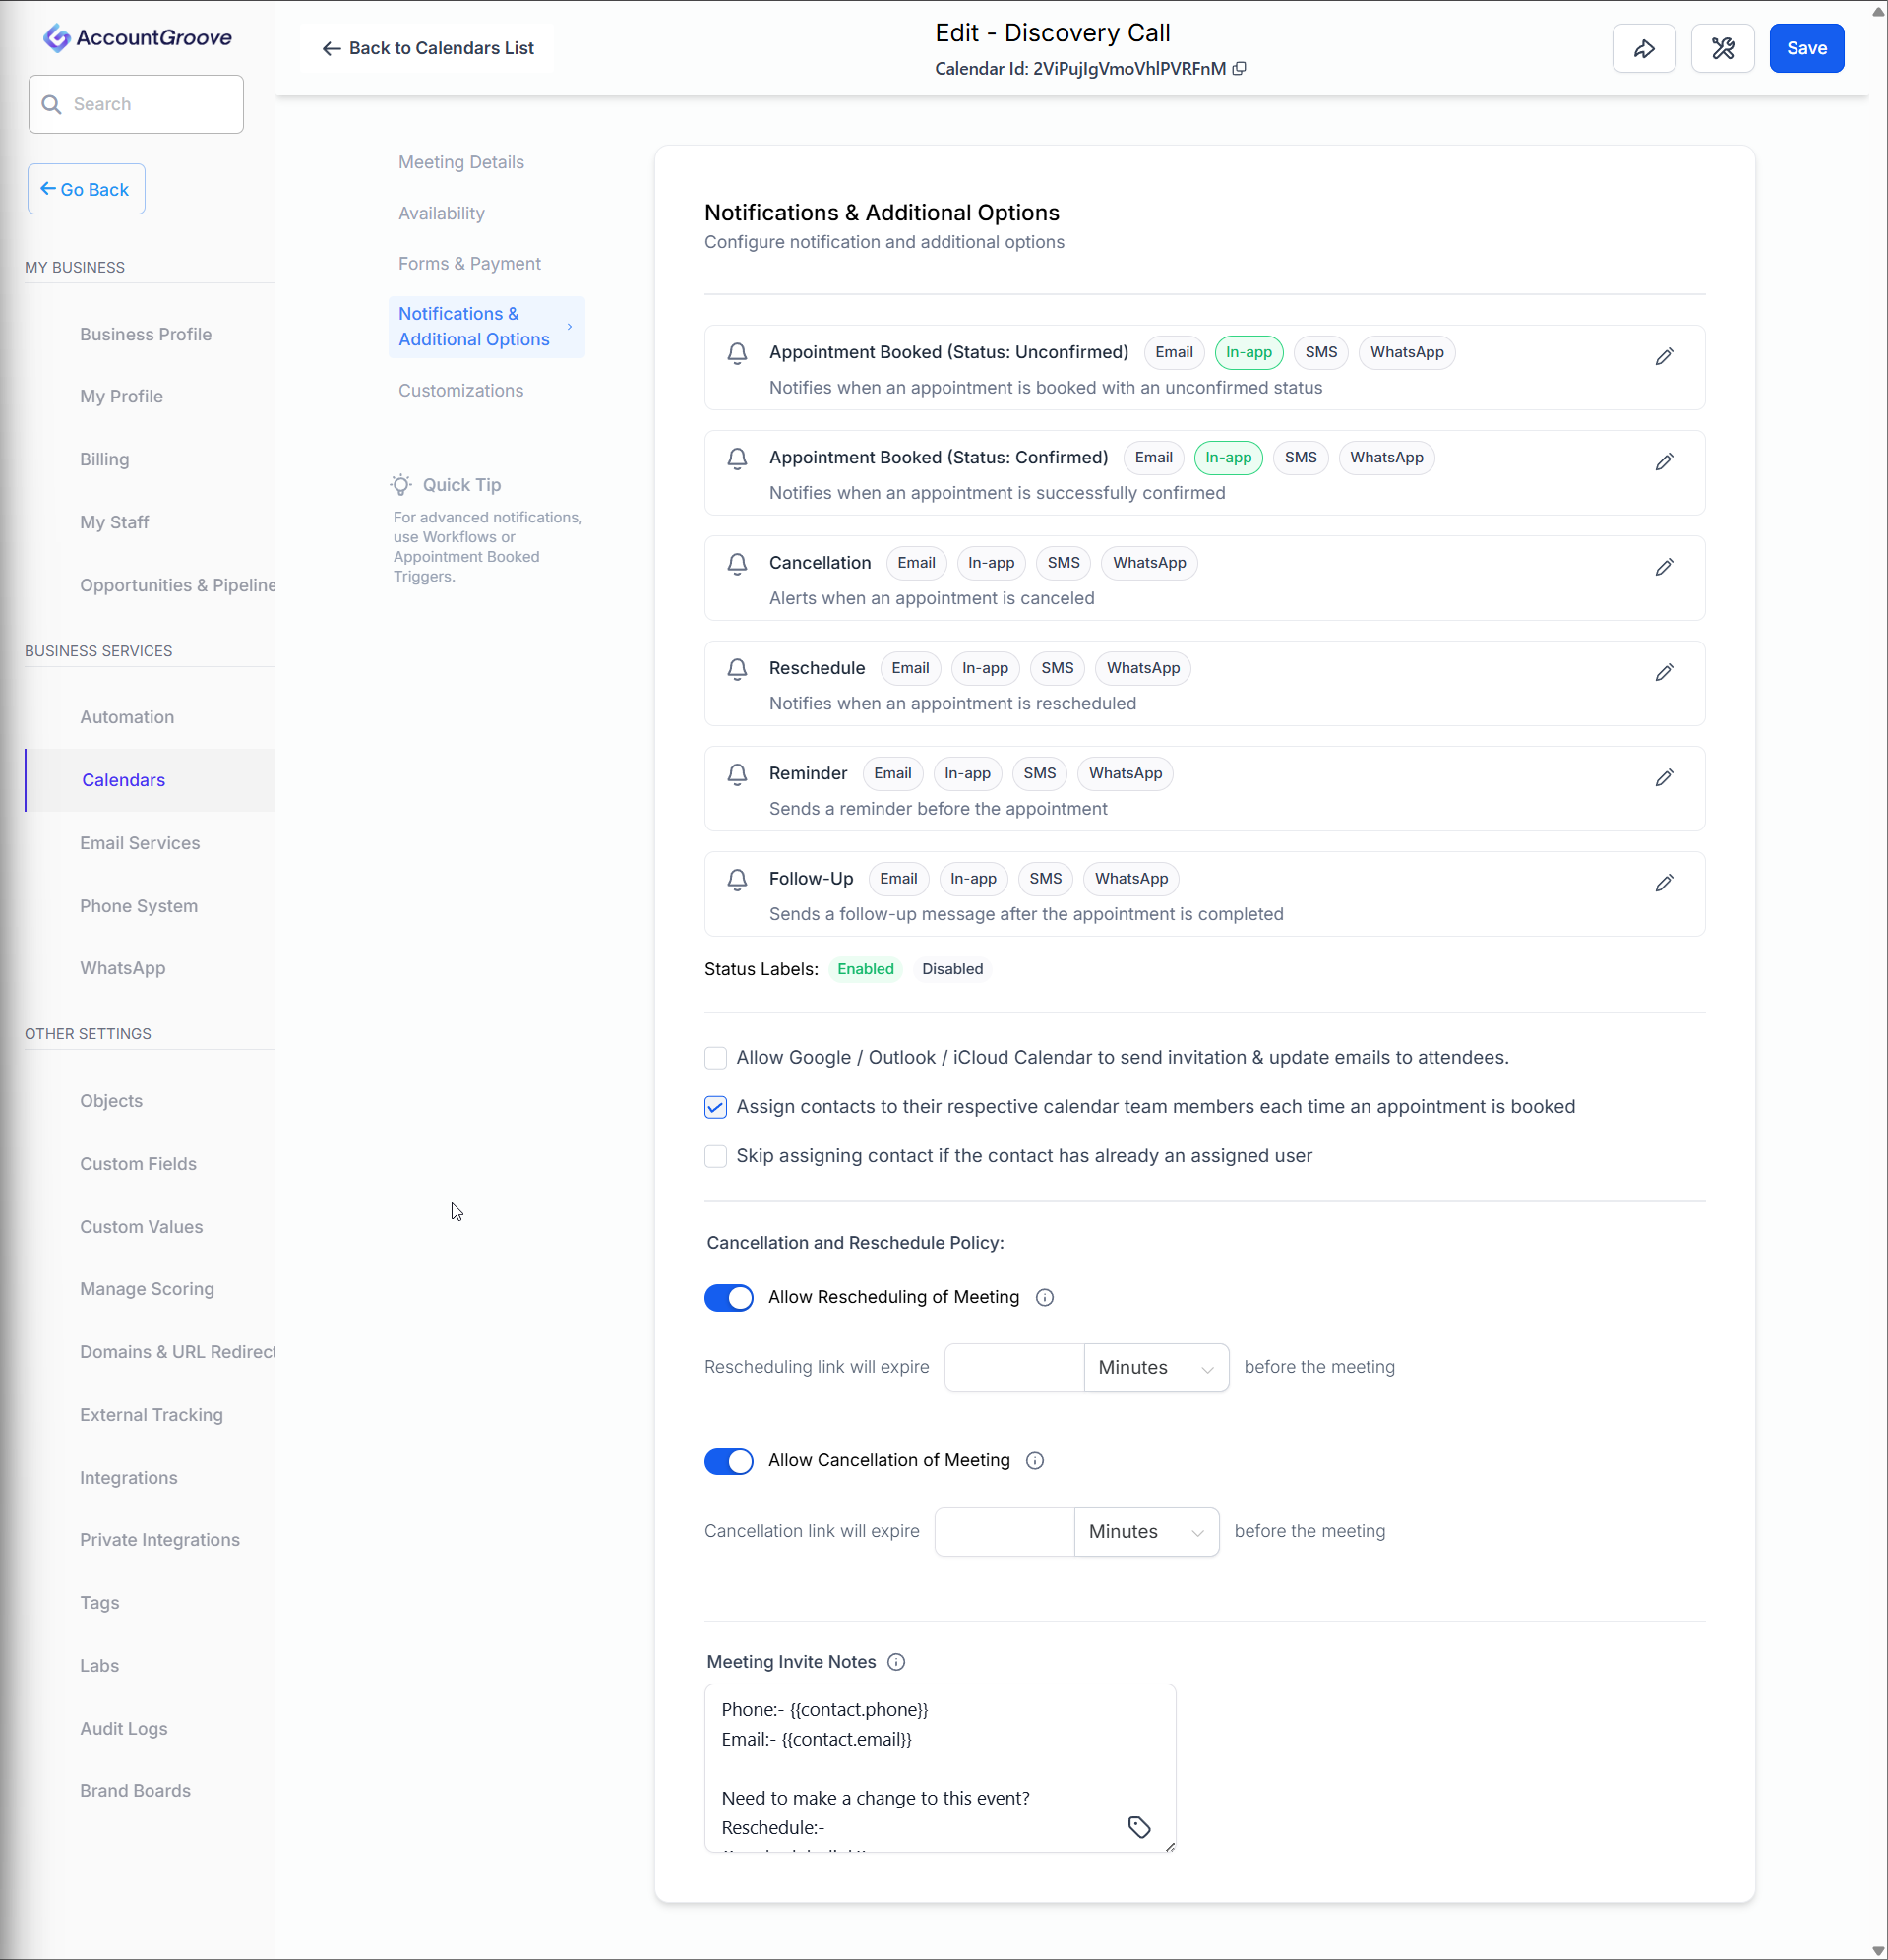
Notifications
Manage alerts and reminders:
- Booking confirmations
- Reminder emails
- Internal notifications
- Cancellation alerts
You can customize messaging to match your tone and brand.
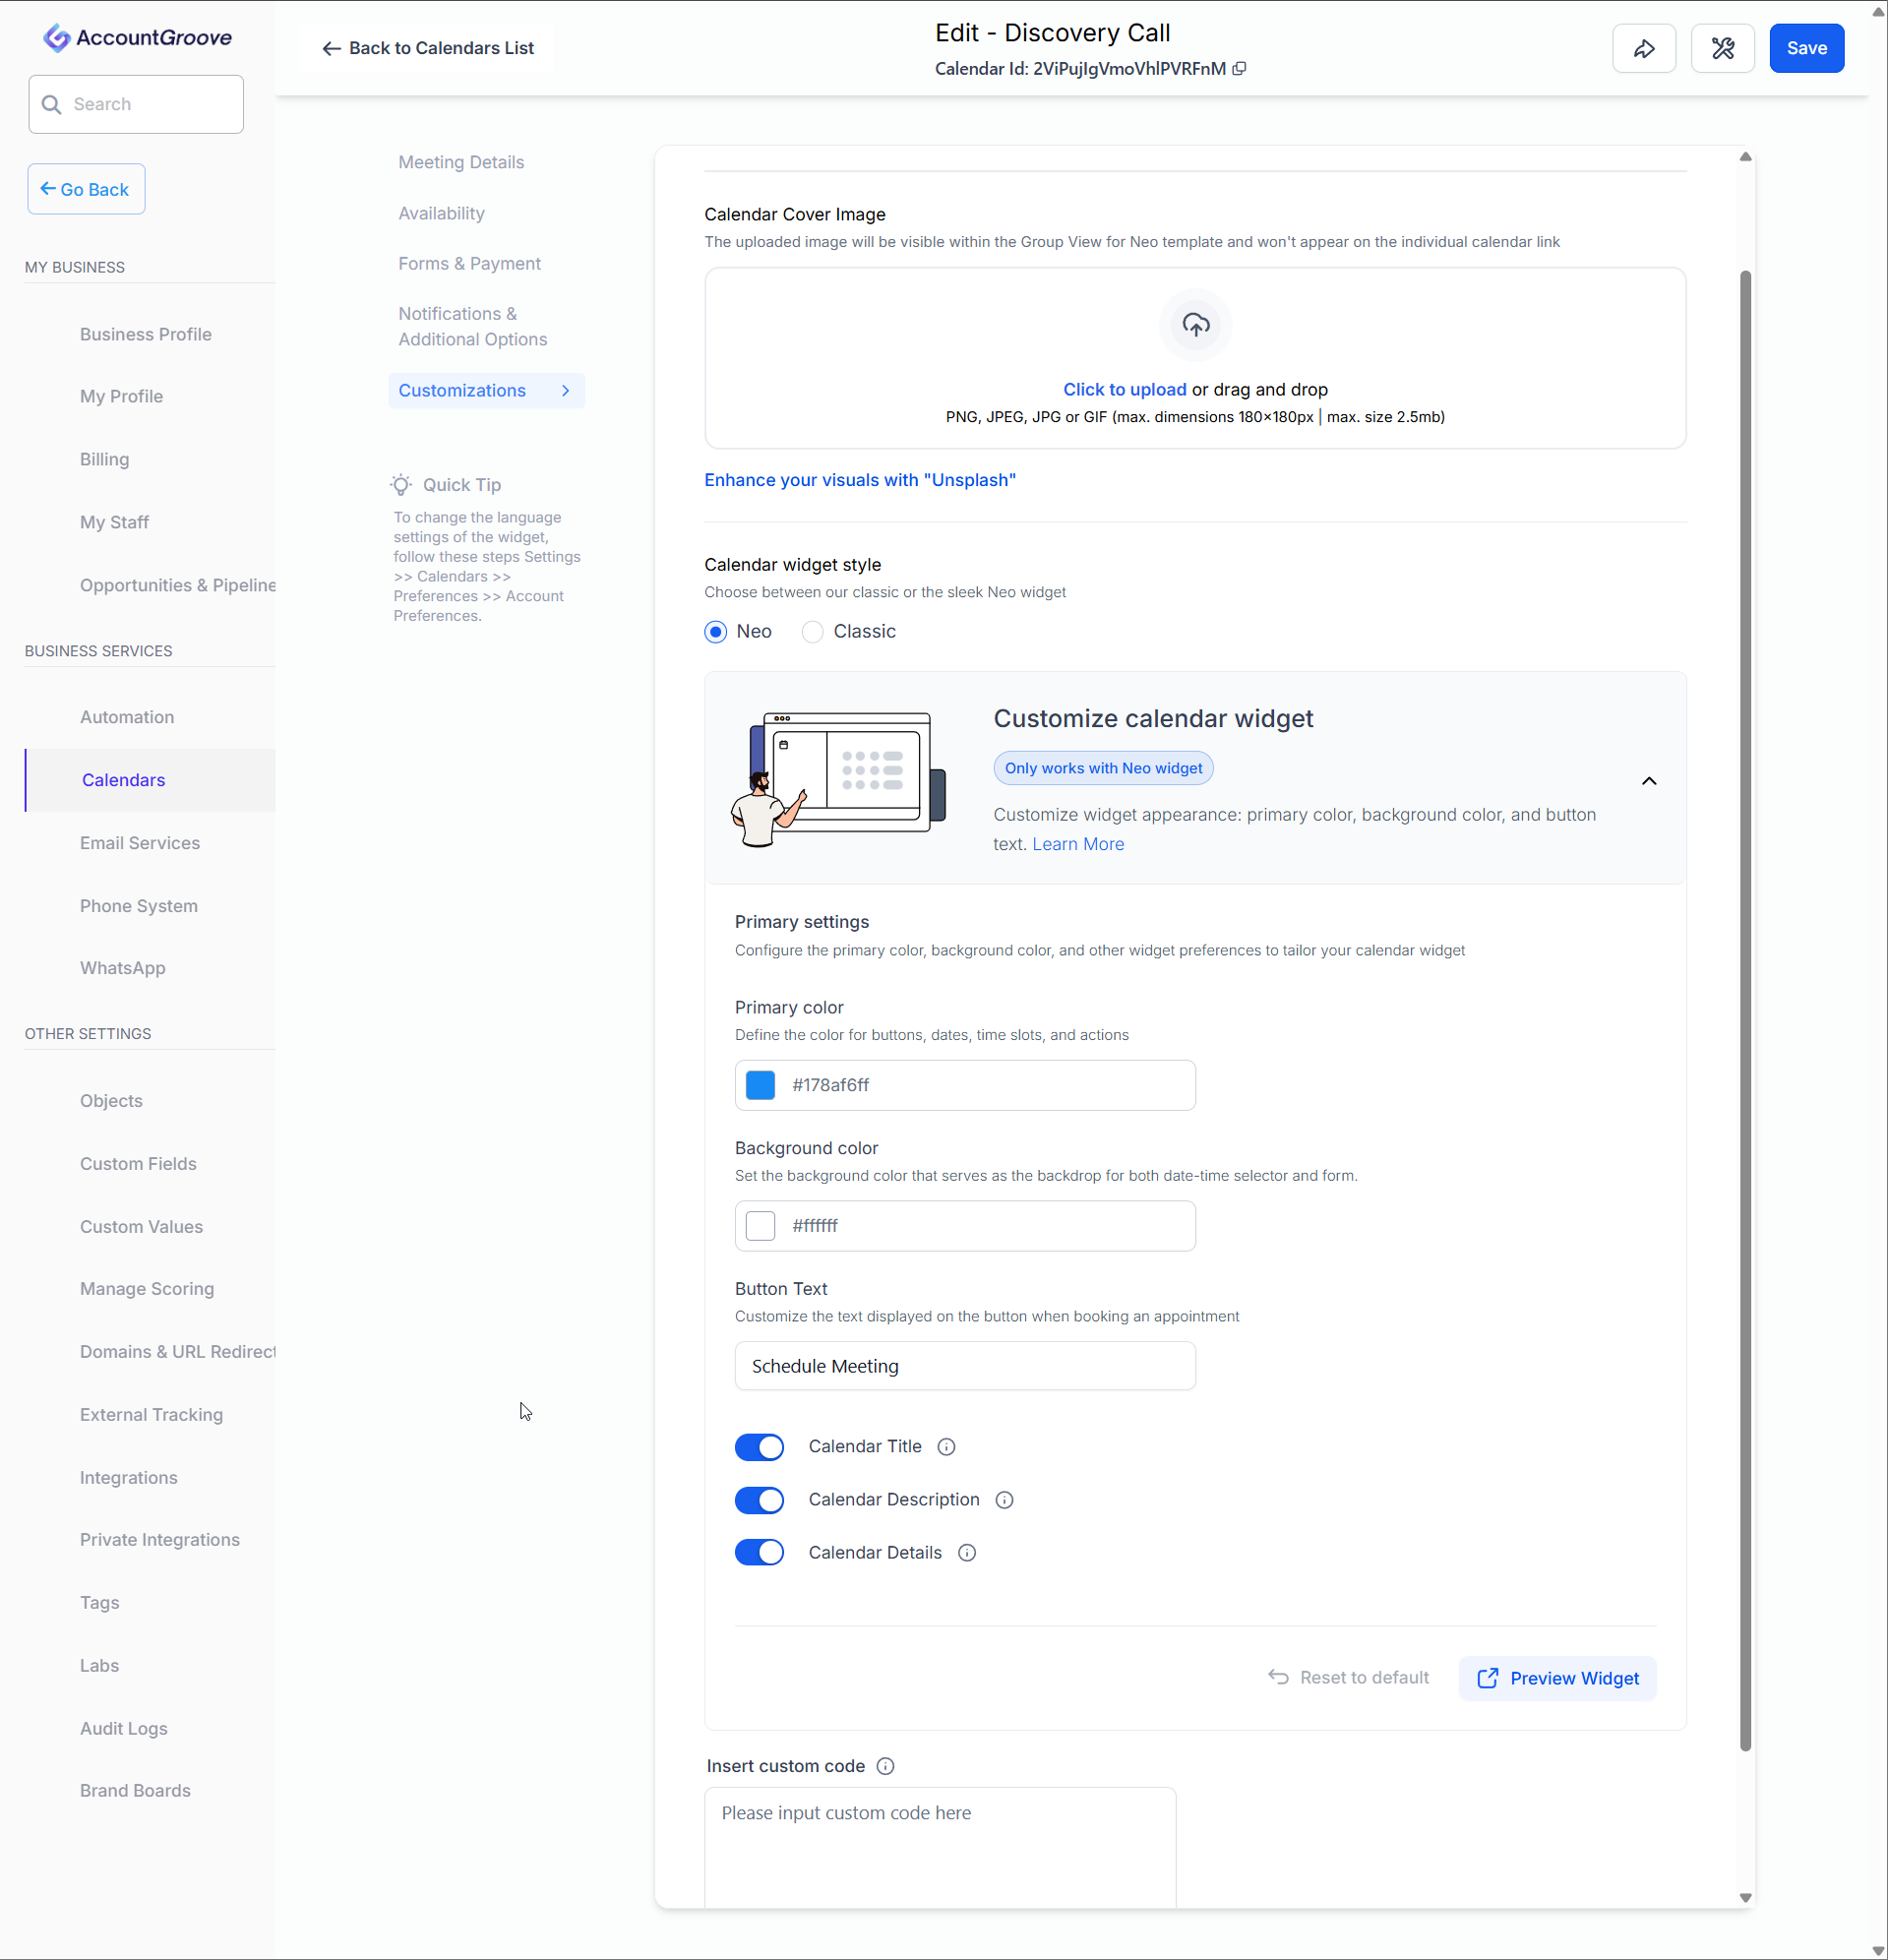
Design & Branding
Customize how your calendar looks:
- Calendar color
- Button styles
- Profile image
- Text labels
This ensures your booking experience matches your brand.
Understanding Customization Options:
Here, you have the freedom to tailor your calendar widget to suit your preferences. Explore the following customization options:
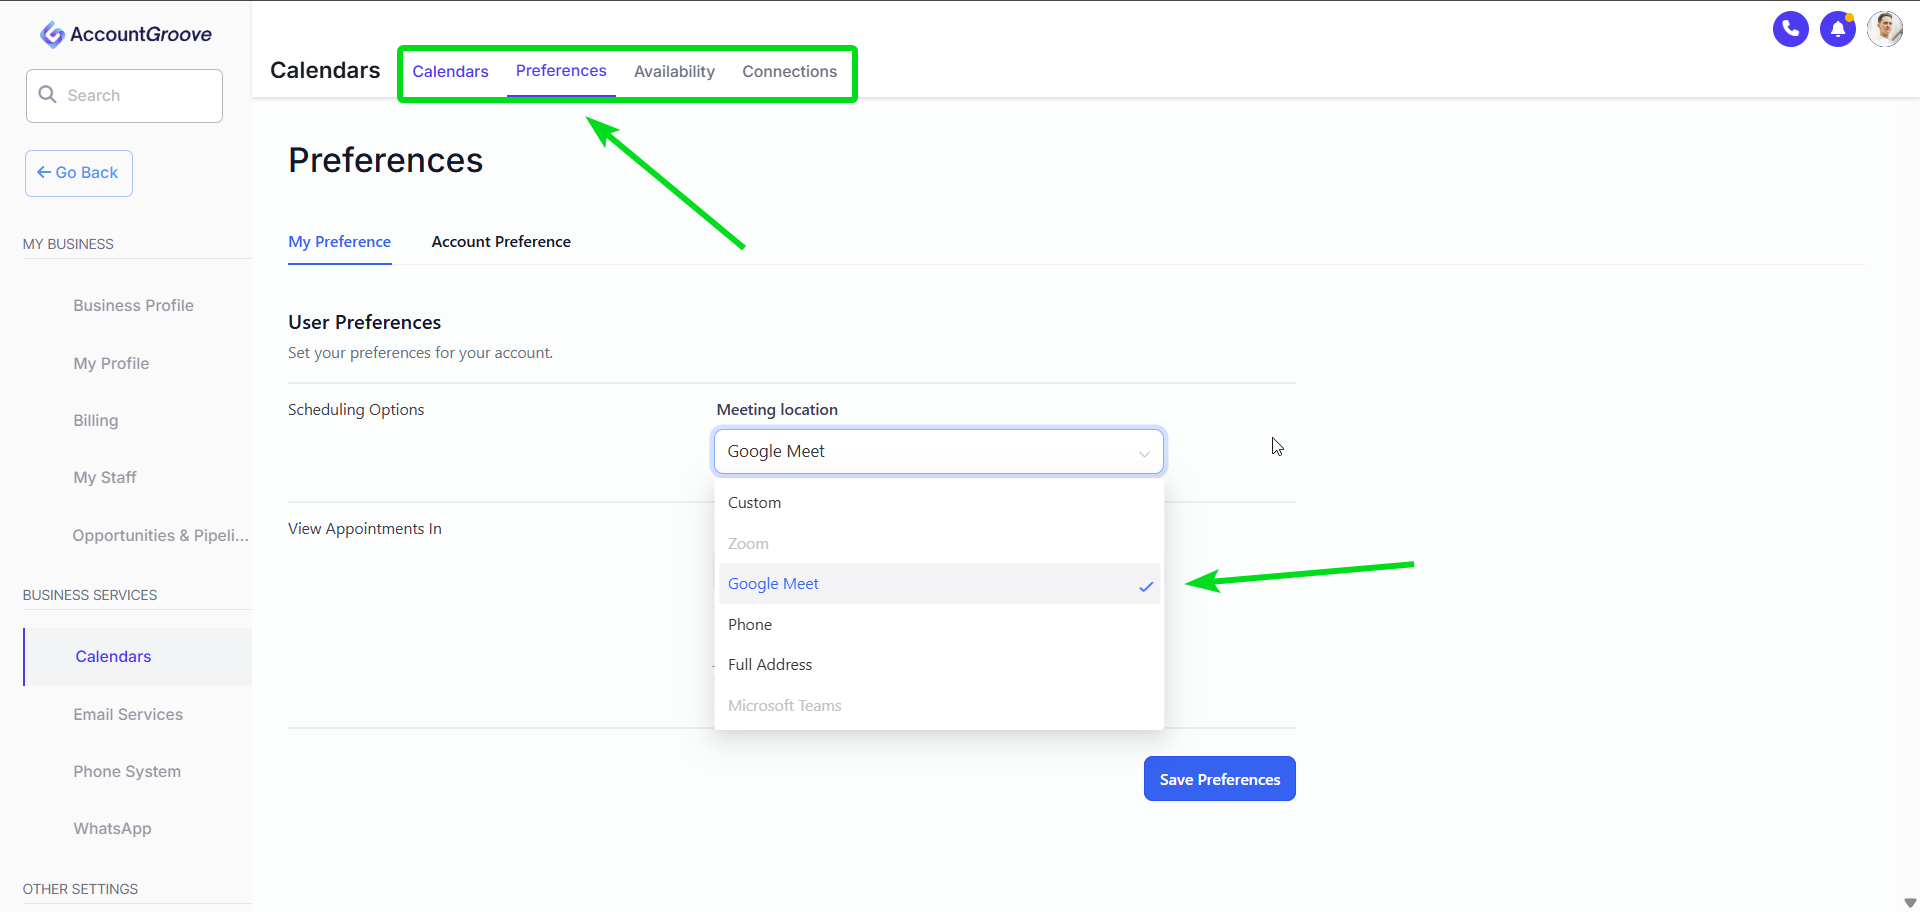
Primary Colour: This will impact buttons, dates, time slots, and various actions within the widget such as Staff Selection, Add Guests etc.
Background Colour: The background color sets the tone for both the date-time selector and the form. If you've got a custom form, its background will mirror the chosen background color, but the form's fields are determined by your specific custom form settings.
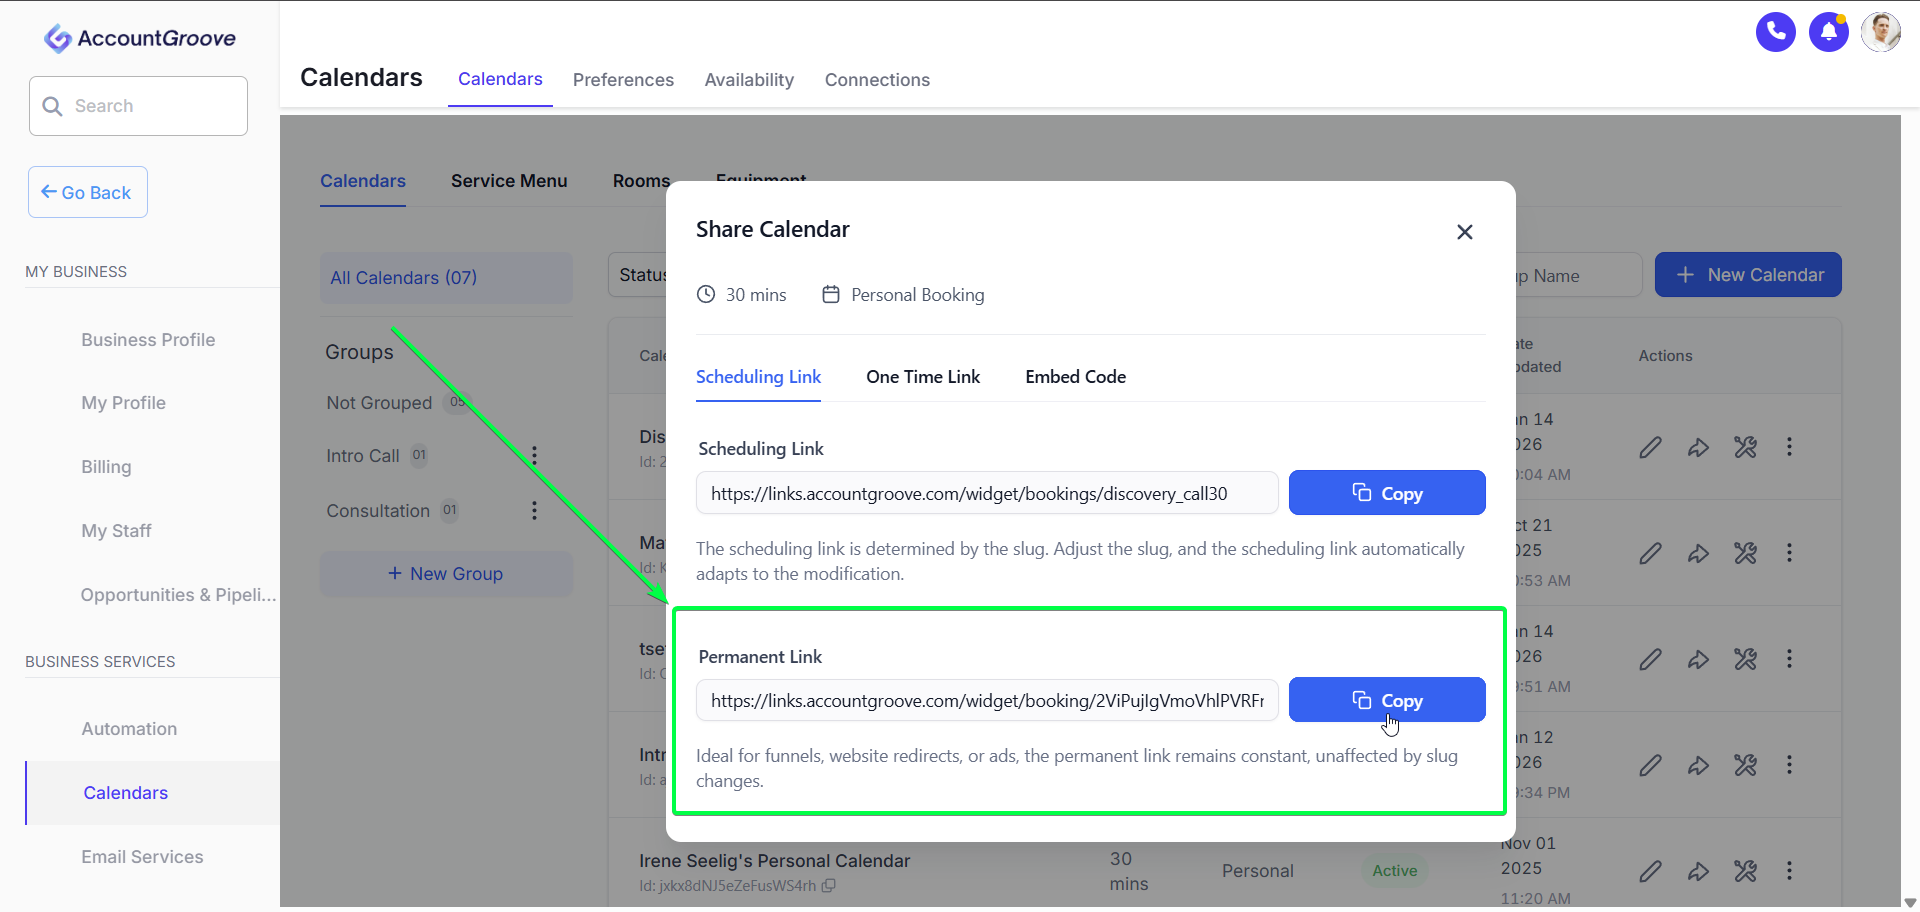
Step 6: Embed or Share Your Calendar
Once your calendar is ready:
- Click Share Calendar next to recently create calendar
- Embed the widget on your website using the provided code
- Use the calendar in funnels or landing pages
Any updates you make to the calendar apply automatically everywhere it’s used.
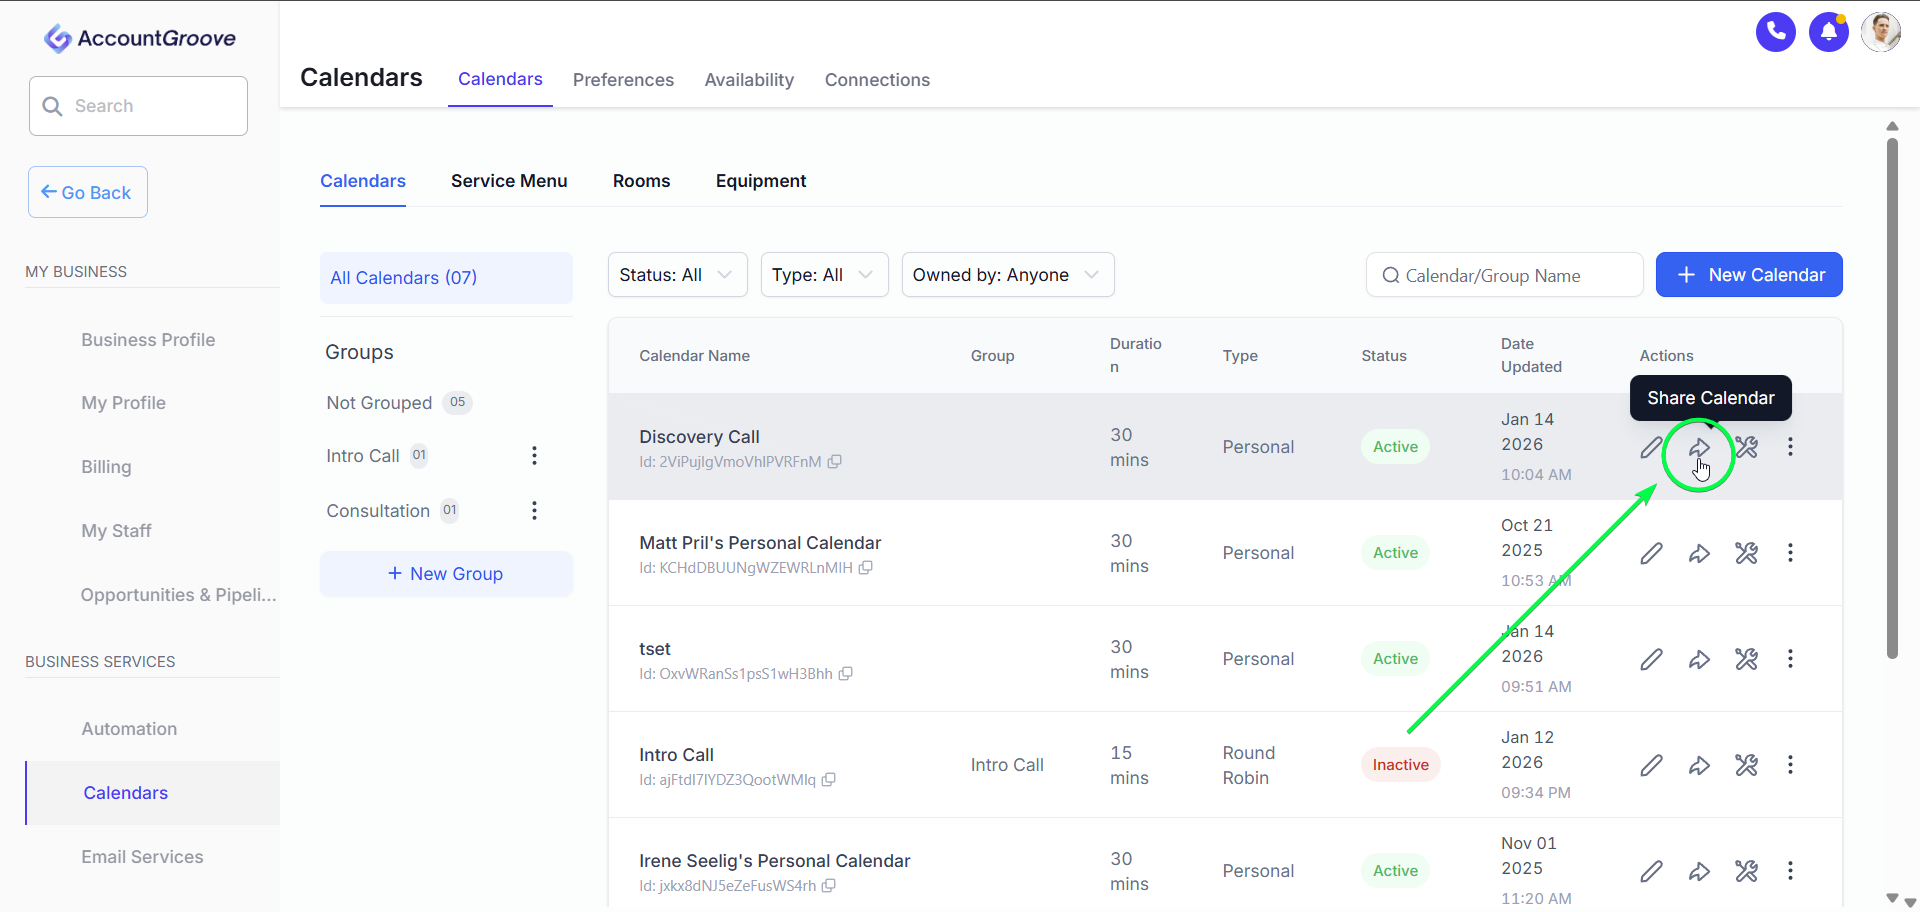
- Copy the direct booking link to share via email or DM
- Use the calendar in funnels or landing pages
Any updates you make to the calendar apply automatically everywhere it’s used.