.png)
How to Use Custom Values in AccountGroove CRM
One powerful features inside the AccountGroove CRM is Custom Values. Custom Values allow you to update key information in one place and have it automatically populate across emails, forms, automations, templates, and more.
Instead of editing every template manually, you update the value once and the system updates it everywhere.
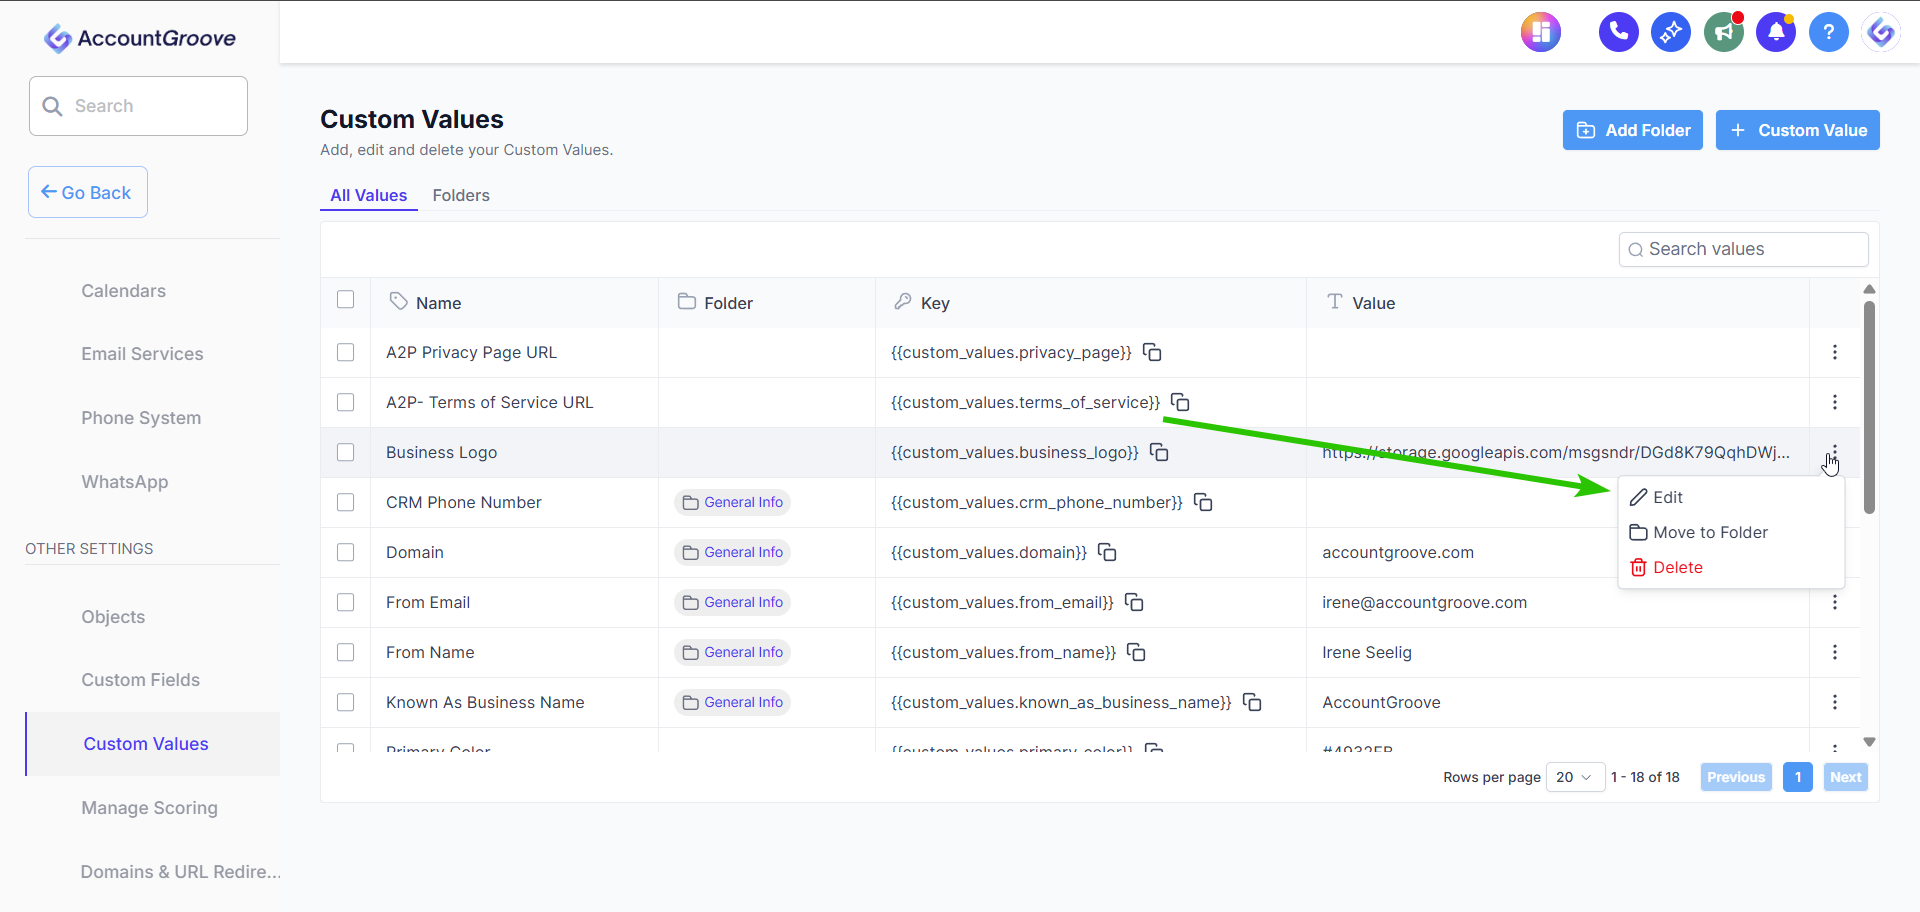
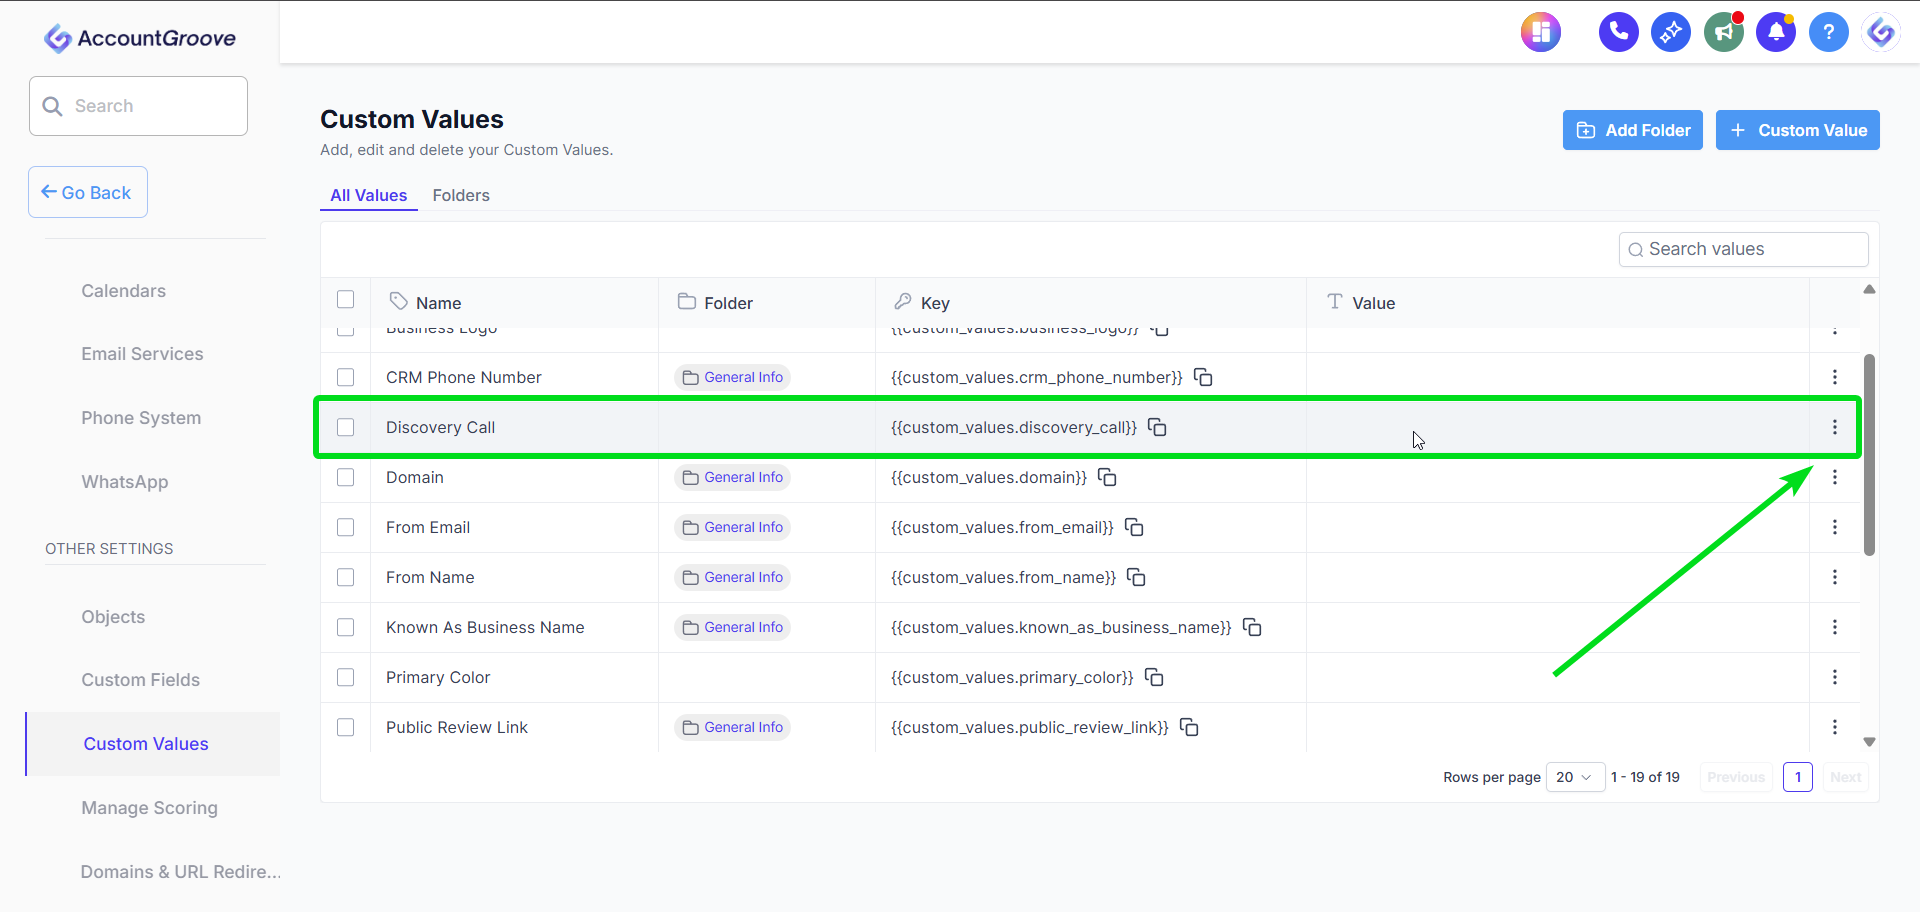
Step 1: Access Custom Values
- Go to Settings
- Scroll down and click Custom Values
Here you will see a list of pre-built Custom Value keys such as:
- From Name
- Business Name
- Primary Color
- Secondary Color
- Logo
- Lead Routing Email
- And more
Important: You do not change the name of the Custom Value. You only update the value.
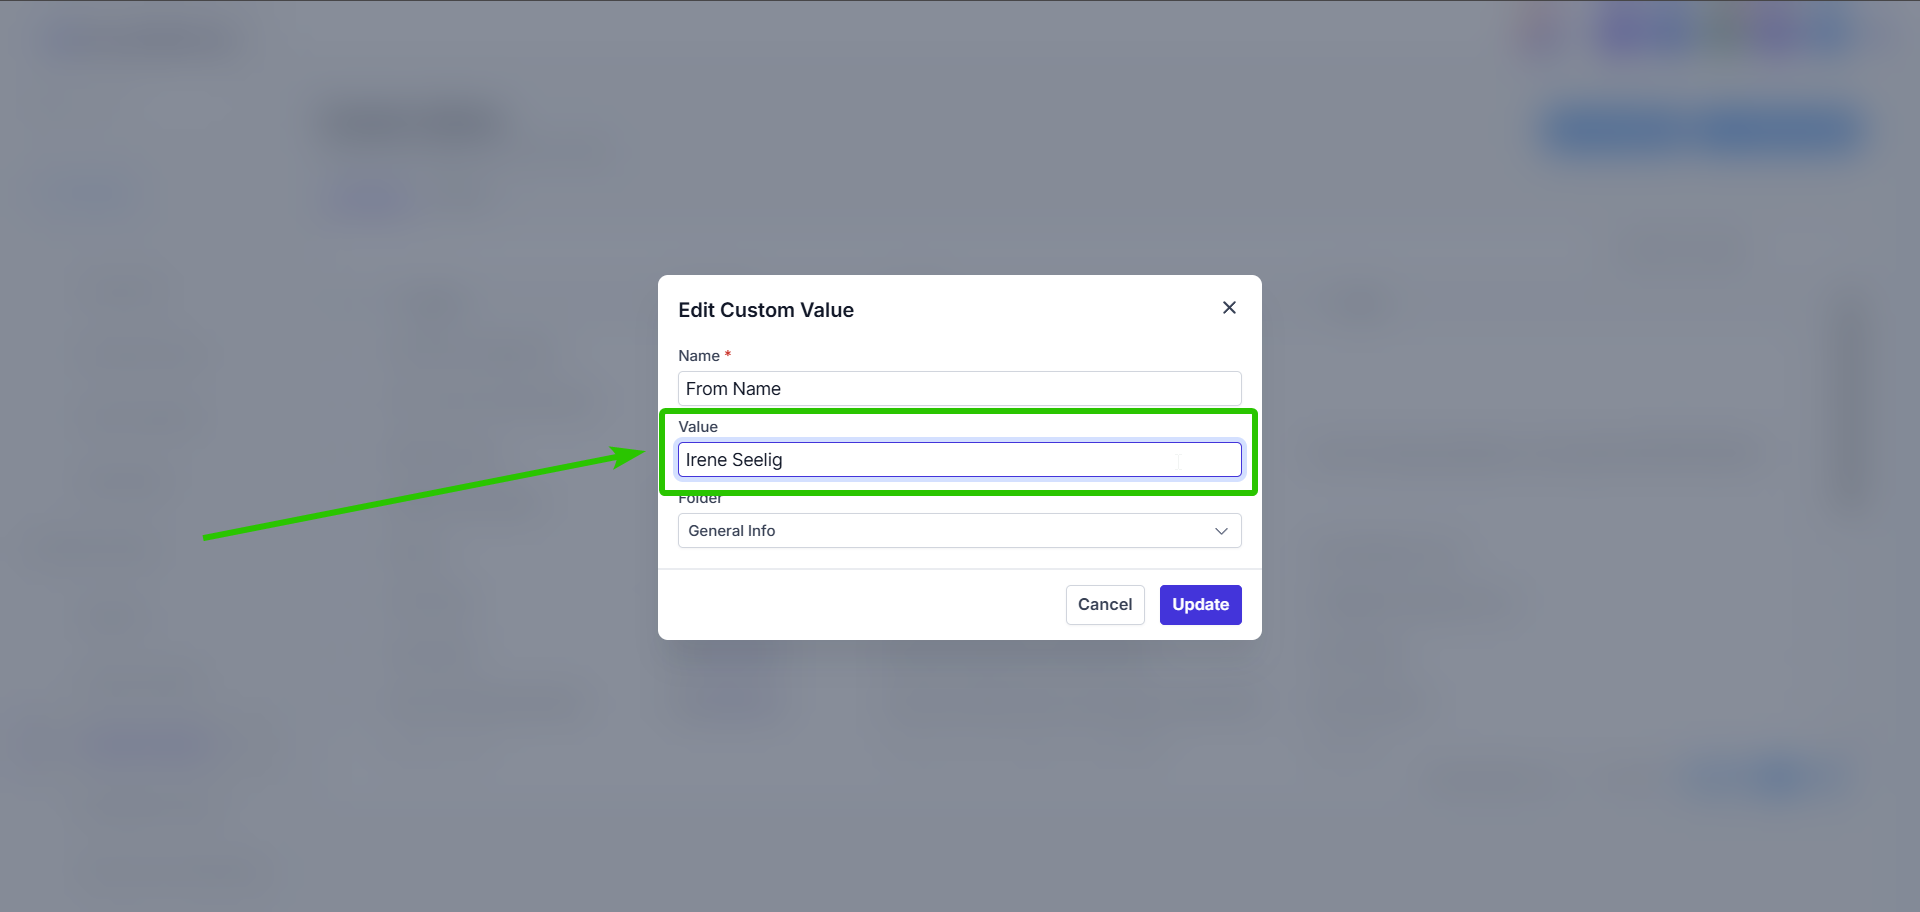
Step 2: Update a Custom Value
- Click Edit next to the Custom Value
- Leave the name unchanged
- Update the Value field
- Click Save
Once saved, that value will automatically update anywhere in the platform where that Custom Value is referenced.
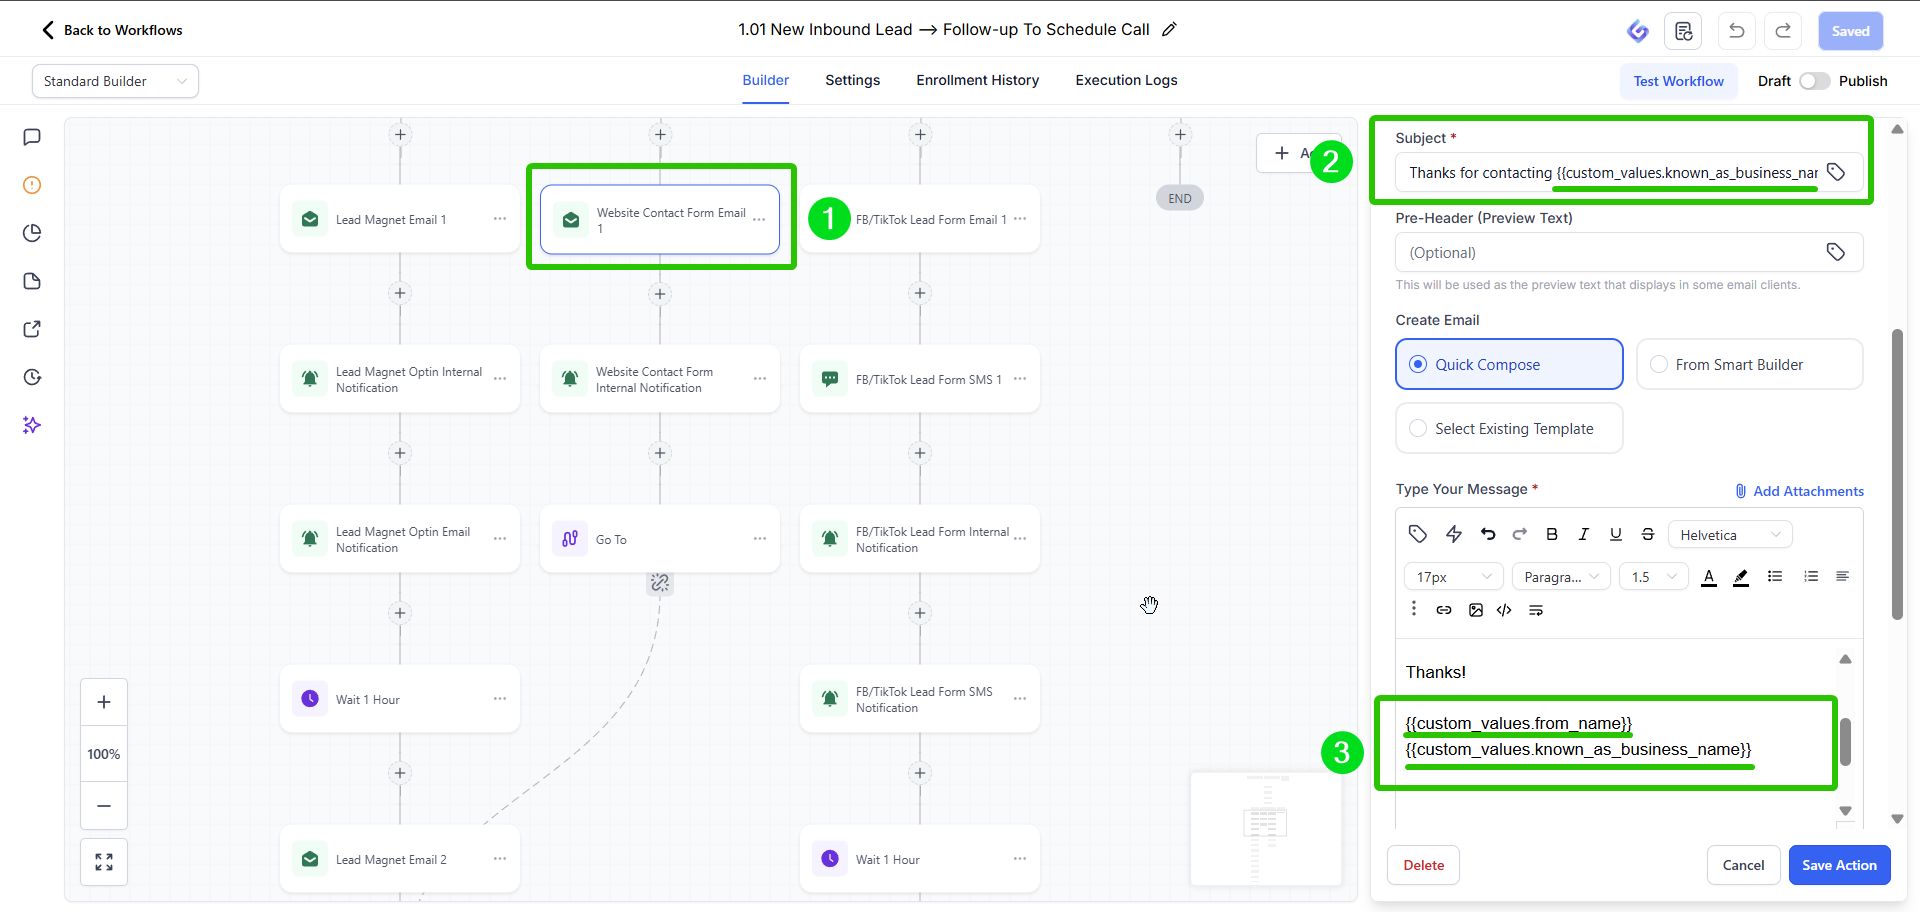
Example:
If you update the “From Name” to Irene, all emails using that Custom Value will now send from Irene.
Step 3: Gather Information About Your Business
Create a folder with all the relevant information:
- Business Logo
- Brand Color Guide (if dont have one use the Tip: below)
- Business Domain etc
Tip: To find your brand HEX Value upload a screenshot of your logo or website to: https://imagecolorpicker.com/ and select the right color.
Step 4: Set Your Brand Colors (Primary and Secondary)
Custom Values also control dynamic branding across templates.
How to Update Your Primary Color
- Locate Custom Value Primary Color
- Enter your brand’s hex color code (example: #2B6CB0)
- Click Save
You can get your hex code by:
- Taking a screenshot of your website
- Using a color picker tool
- Using the browser inspect tool
Once updated, buttons and design elements across templates will automatically match your branding.
Repeat the same steps for the Secondary Color.
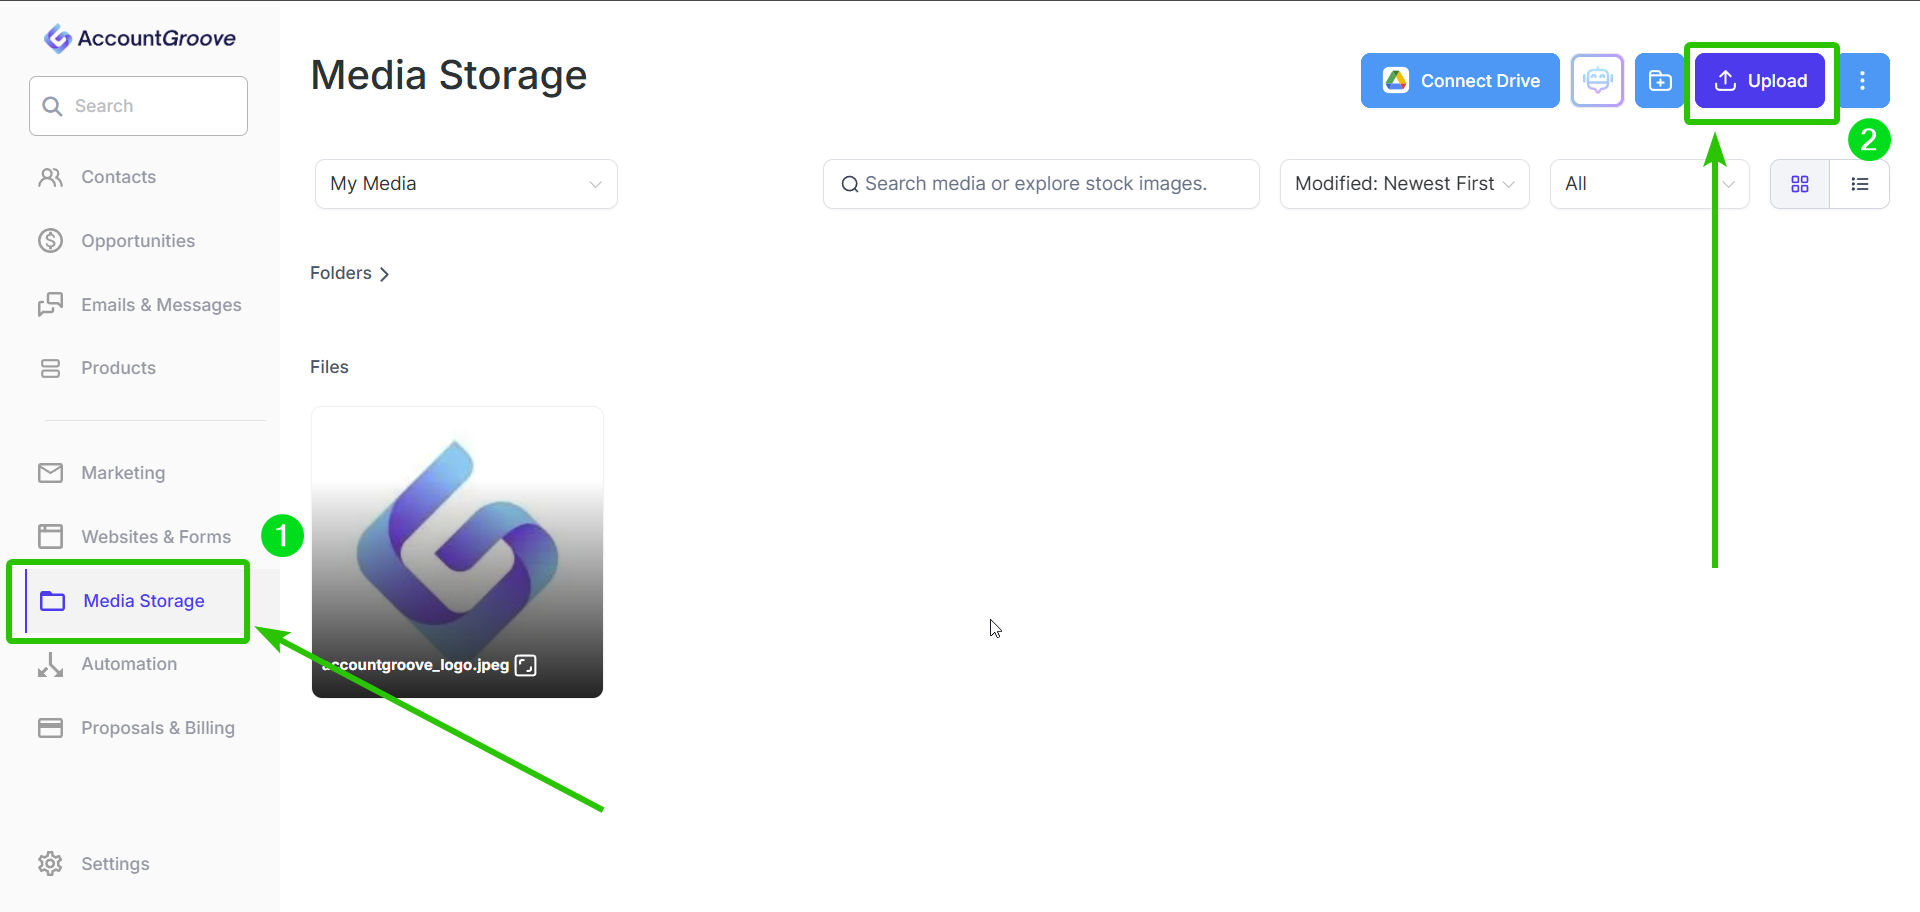
Step 5: Update Your Business Logo
This one requires an extra step.
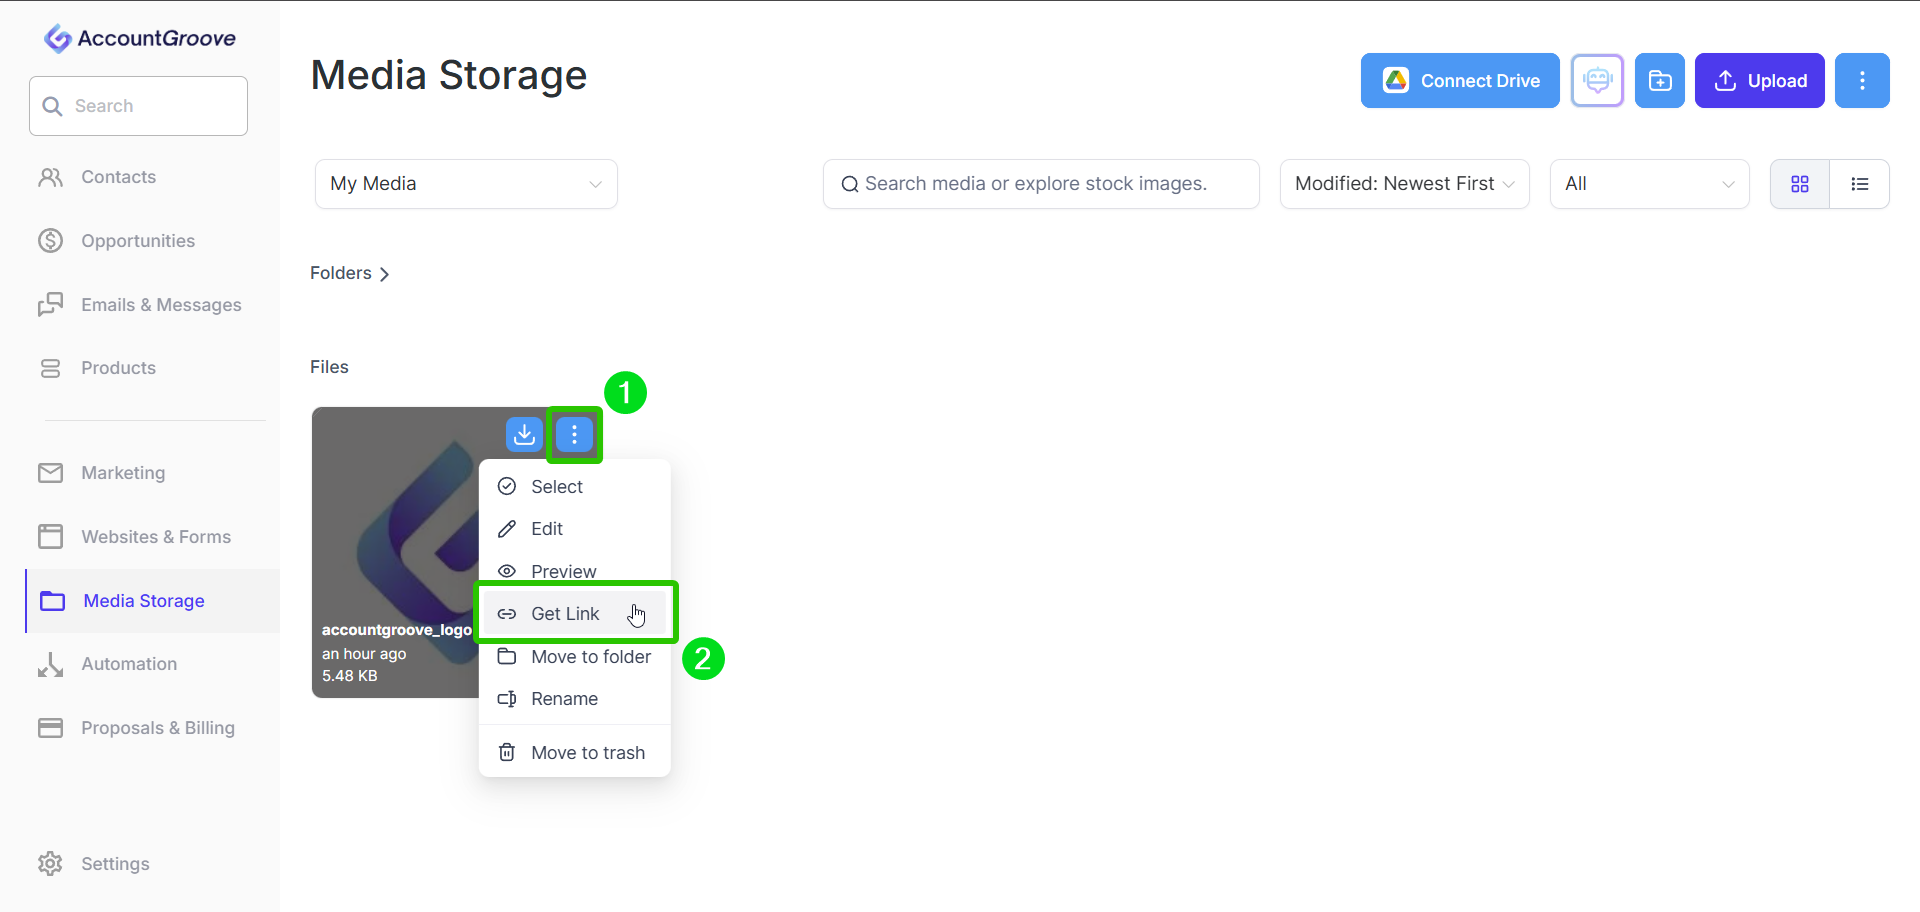
First: Upload Your Logo
- Go to Media Storage
- Upload your logo
- Click on the image
- Copy the file link
Then: Add the Logo Link to Custom Values
- Go back to Settings
- Open Custom Values
- Find the Logo Custom Value
- Paste the copied link into the Value field
- Click Save
Your logo will now populate automatically anywhere it is referenced.
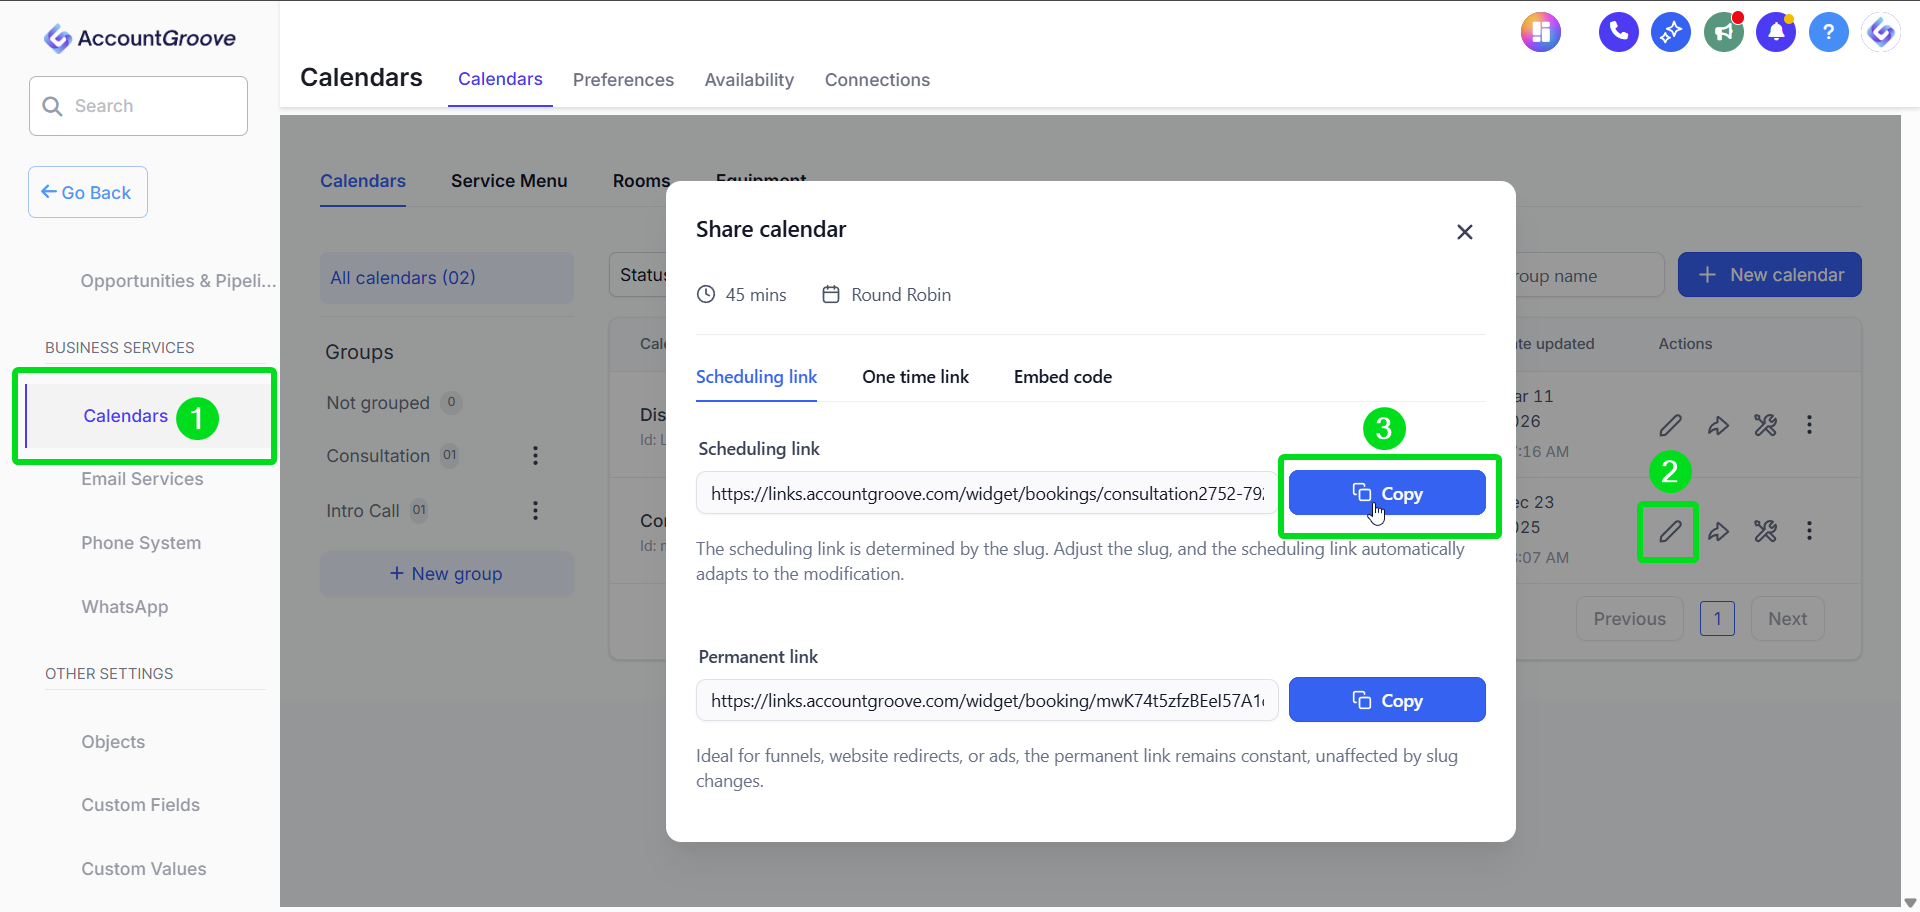
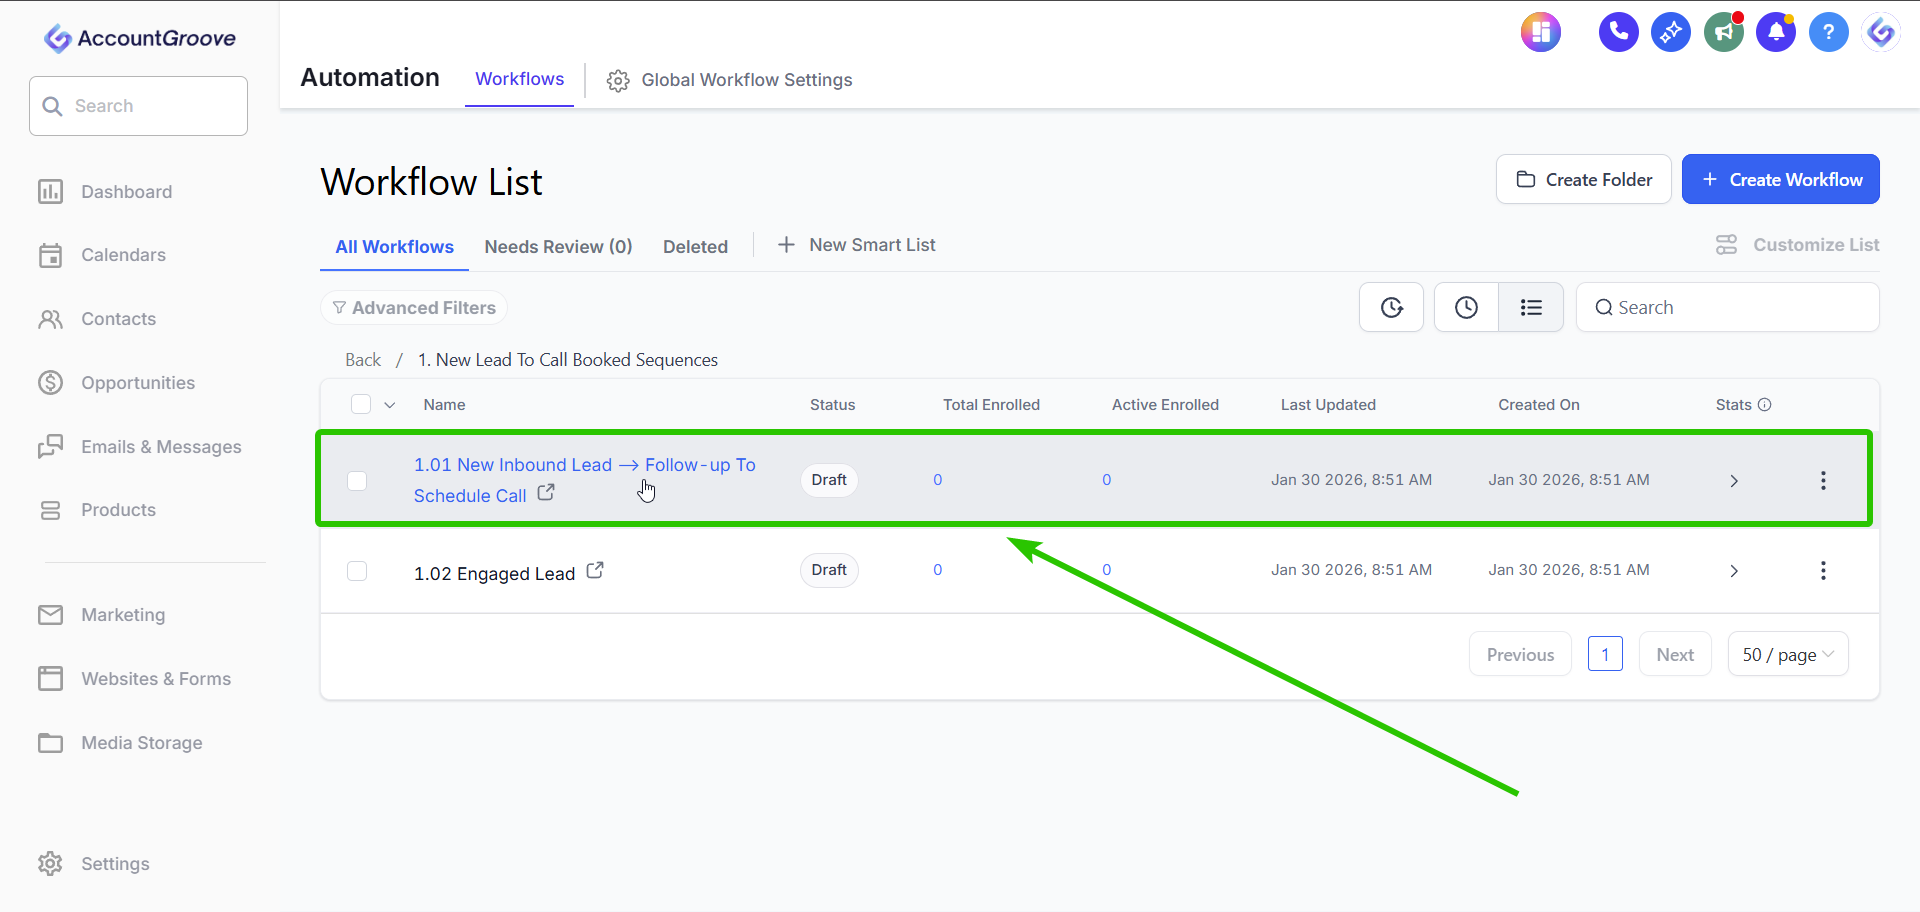
Step 6: How to Add your calendar to populate across automations
To populate your calendar across the standard automations:

Step 7: How to Bypass a Custom Value
If you want to override a Custom Value in a specific email or automation:
- Open the email inside your automation
- Find the Custom Value reference (example: {{custom_values.from_name}})
- Delete the Custom Value tag
- Replace it with a static name (example: Matt)
- Save
That email will now use the static value instead of the global Custom Value.
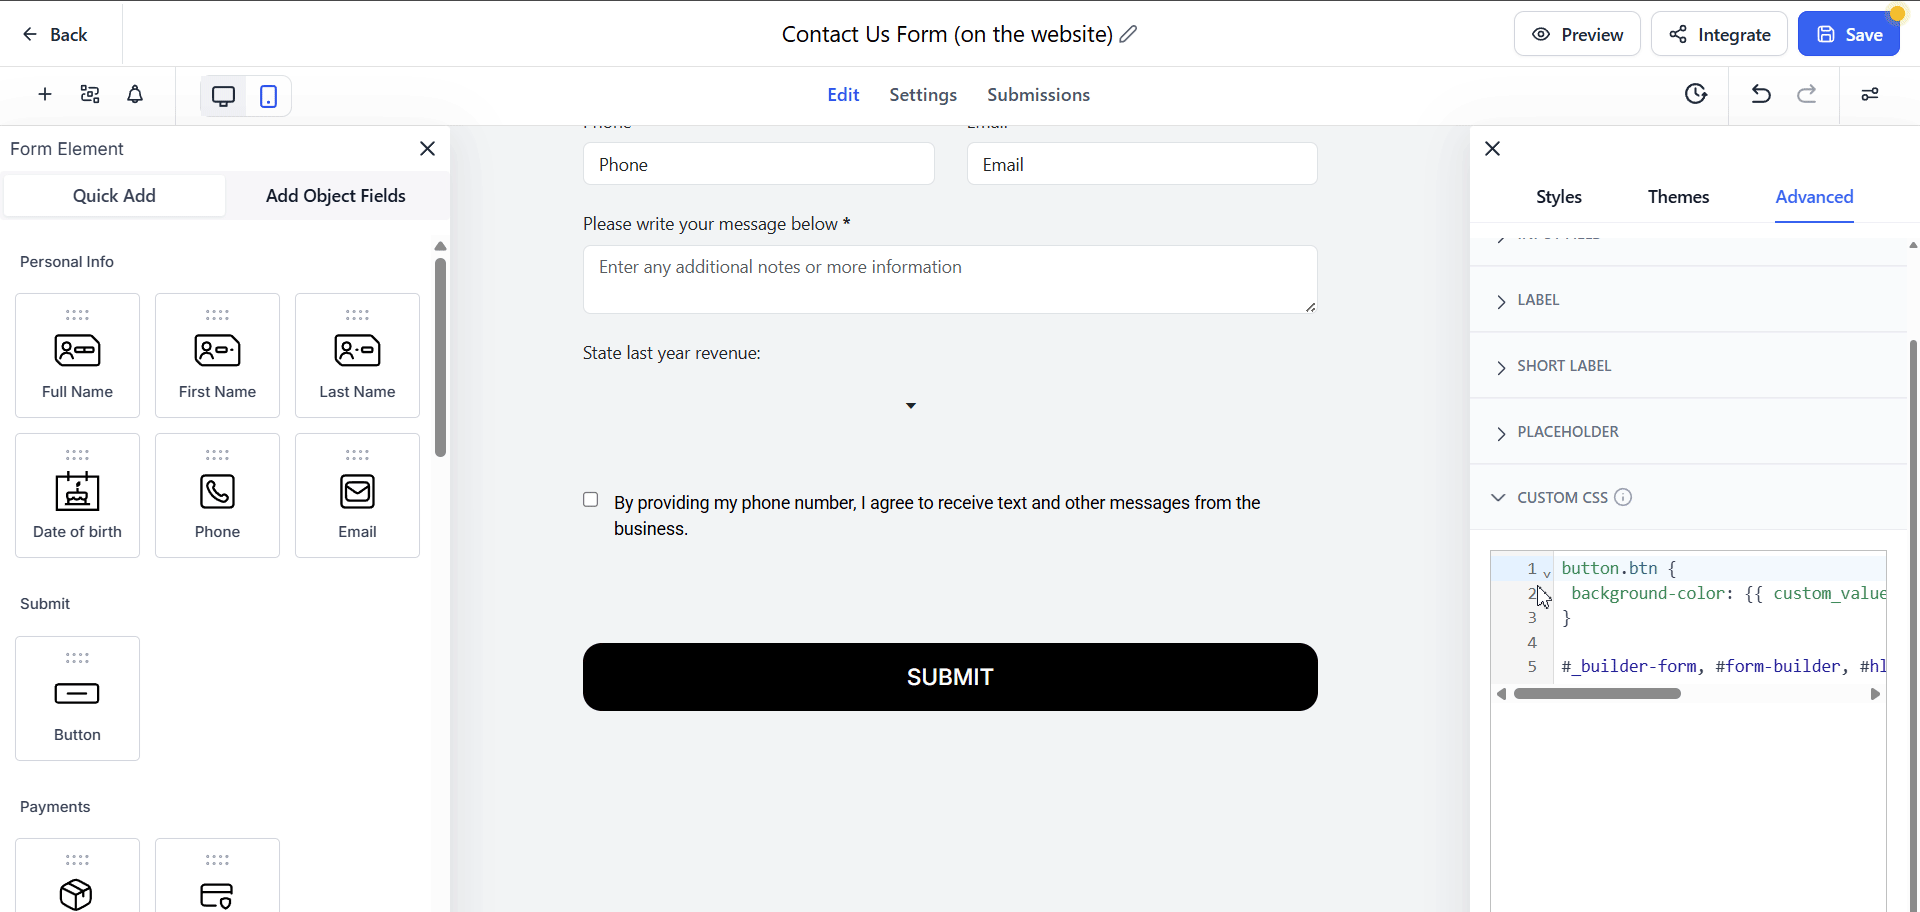
Step 8: Where to Custom Fields to Update:
- Forms Templates provided by AccountGroove

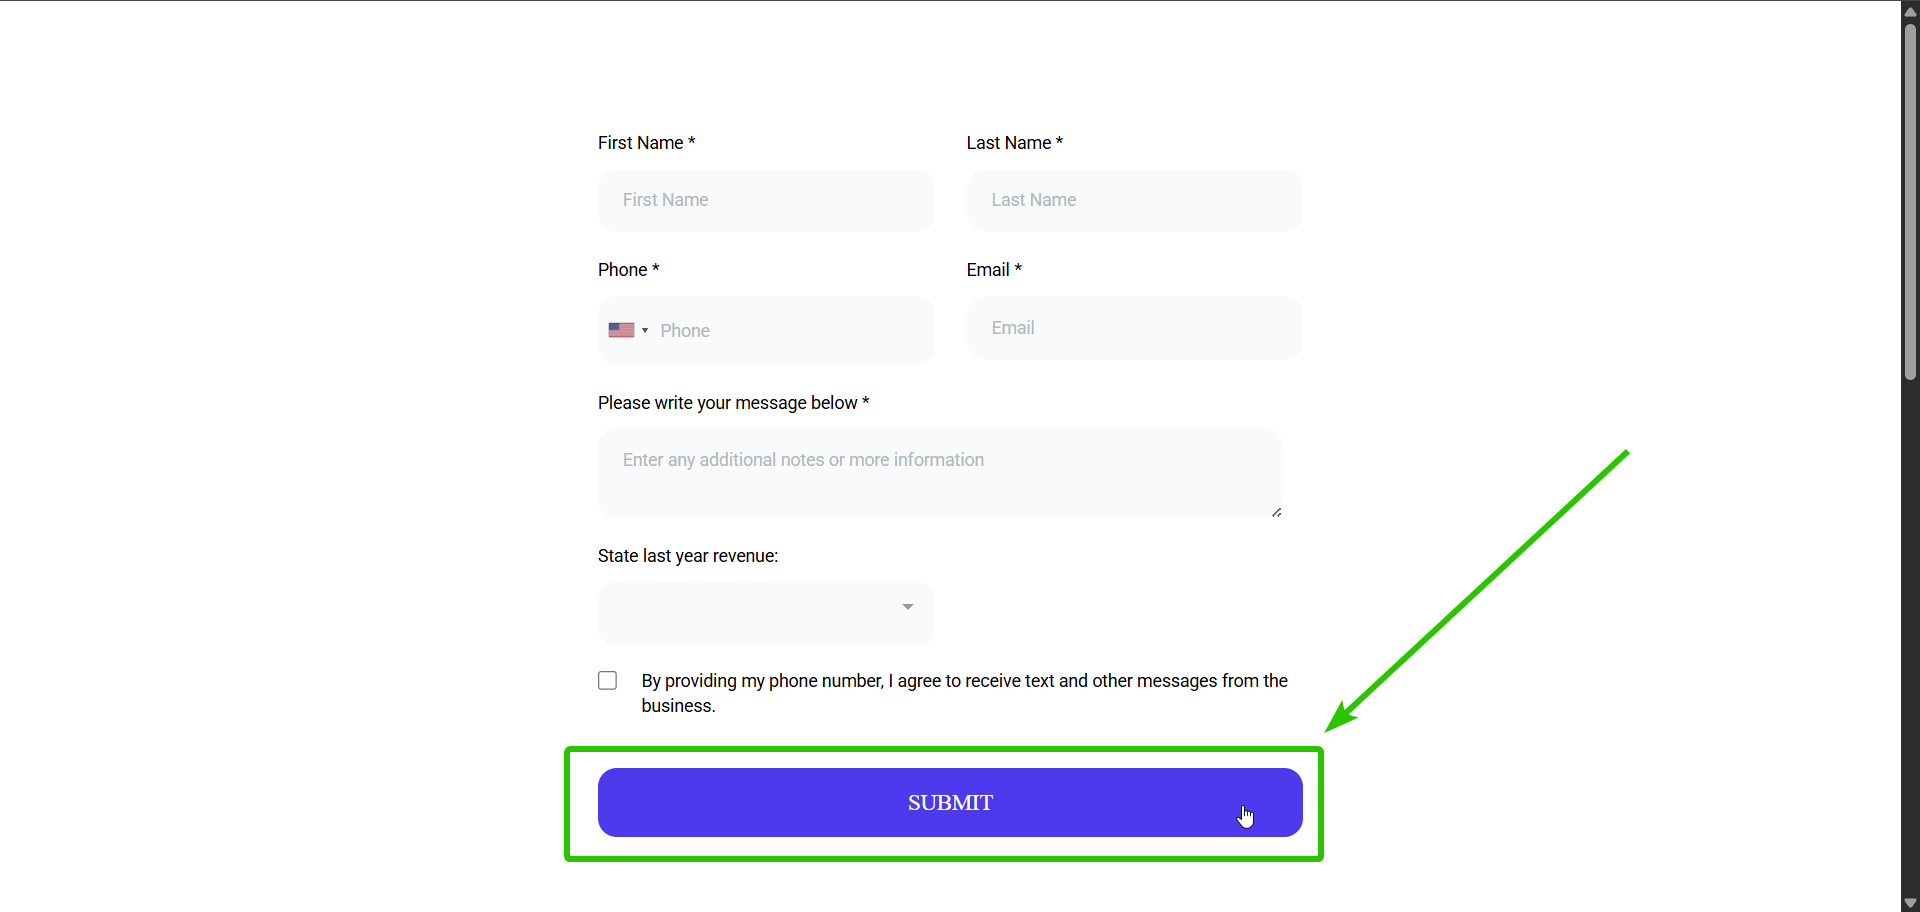
Here you will see the buttons automatically updated to your Custom Value Primary Color / HEX Value:
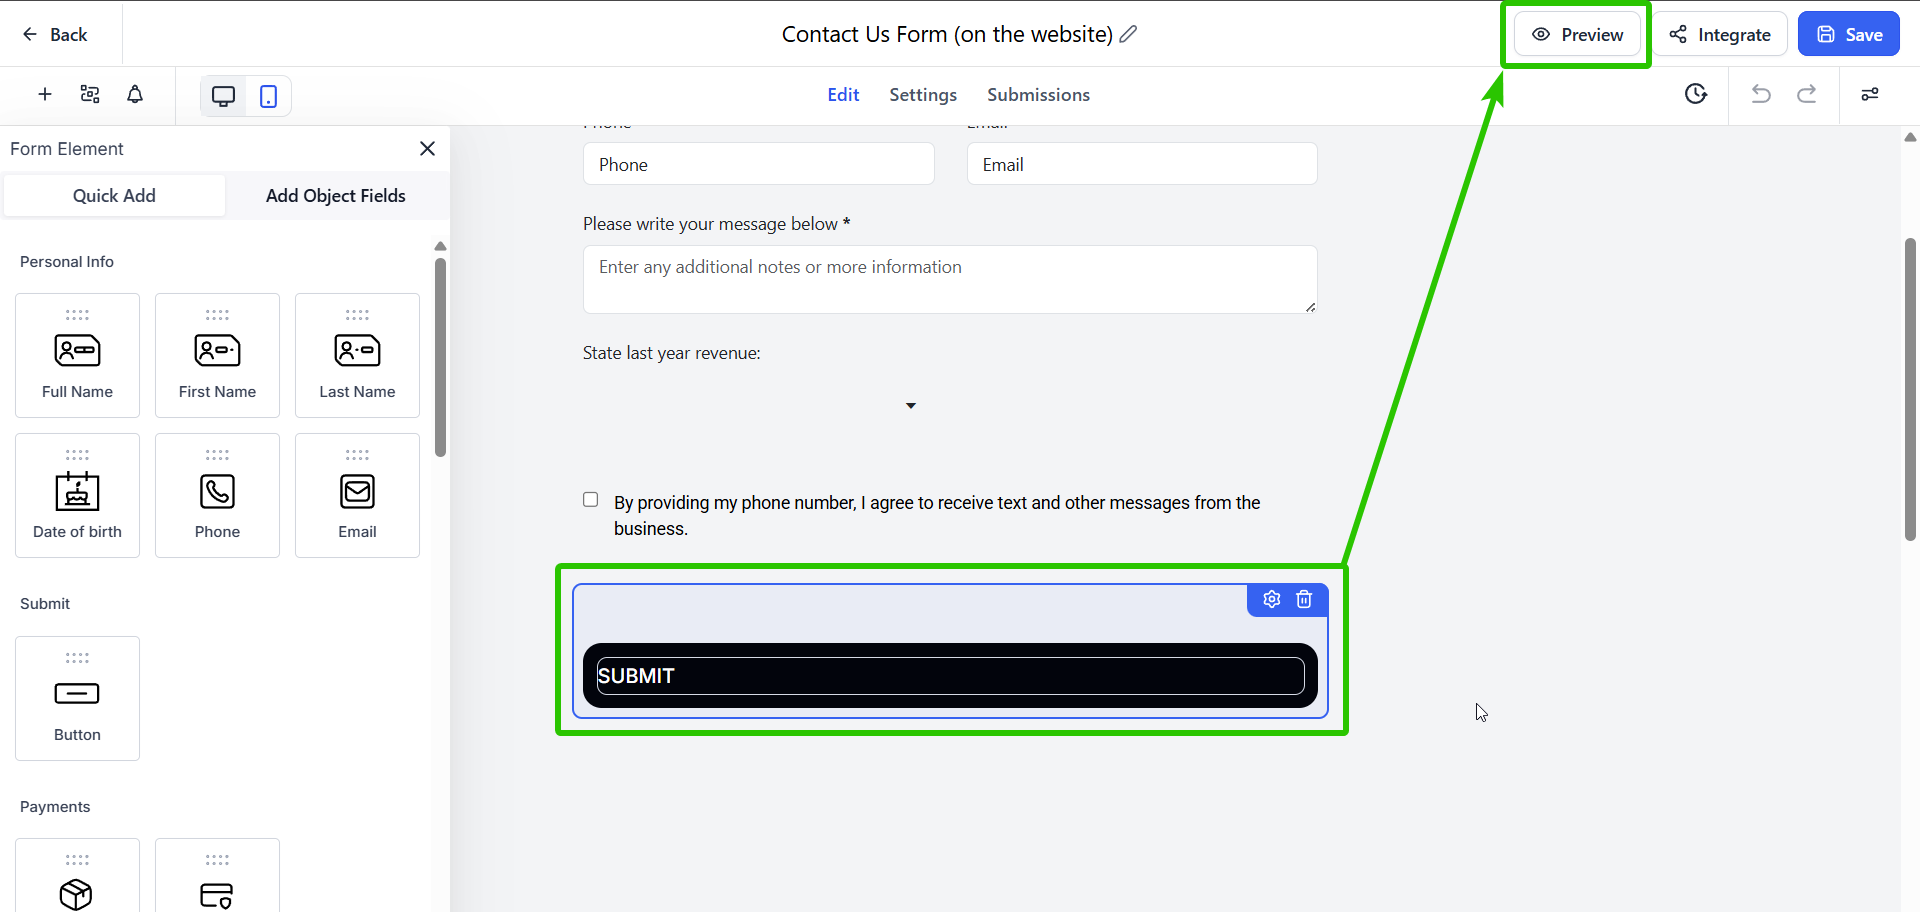
Note: When you click preview you will see the update to you Custom Value Primary Color / HEX Value in real time:
Important: To remove the dynamic coloring from your form, buttons, etc, delete the Custom CSS and click Save. You can then edit the colors however you prefer.
*This action cannot be reversed, so be sure to duplicate the form first.
- Automations:
Why This Matters
Using Custom Values allows you to:
- Update branding instantly across the platform
- Change sender names globally
- Adjust routing emails without editing multiple workflows
- Maintain consistency across templates
- Save significant time during onboarding and updates
Instead of editing dozens of emails and forms, you edit once and the entire system updates automatically.
If you'd like, I can also create a condensed client-facing version of this for your onboarding portal.