.png)
Sending an Email to Multiple Contacts
AccountGroove allows you to send a single email to multiple contacts using Email Marketing. This feature is ideal for announcements, updates, reminders, and one time outreach to leads or clients.
When to Use This
Use this method when you want to:
- Send a broadcast style email
- Notify multiple contacts at once
- Reach a specific list, tag, or segment
- Send a one off message (not an automated sequence)
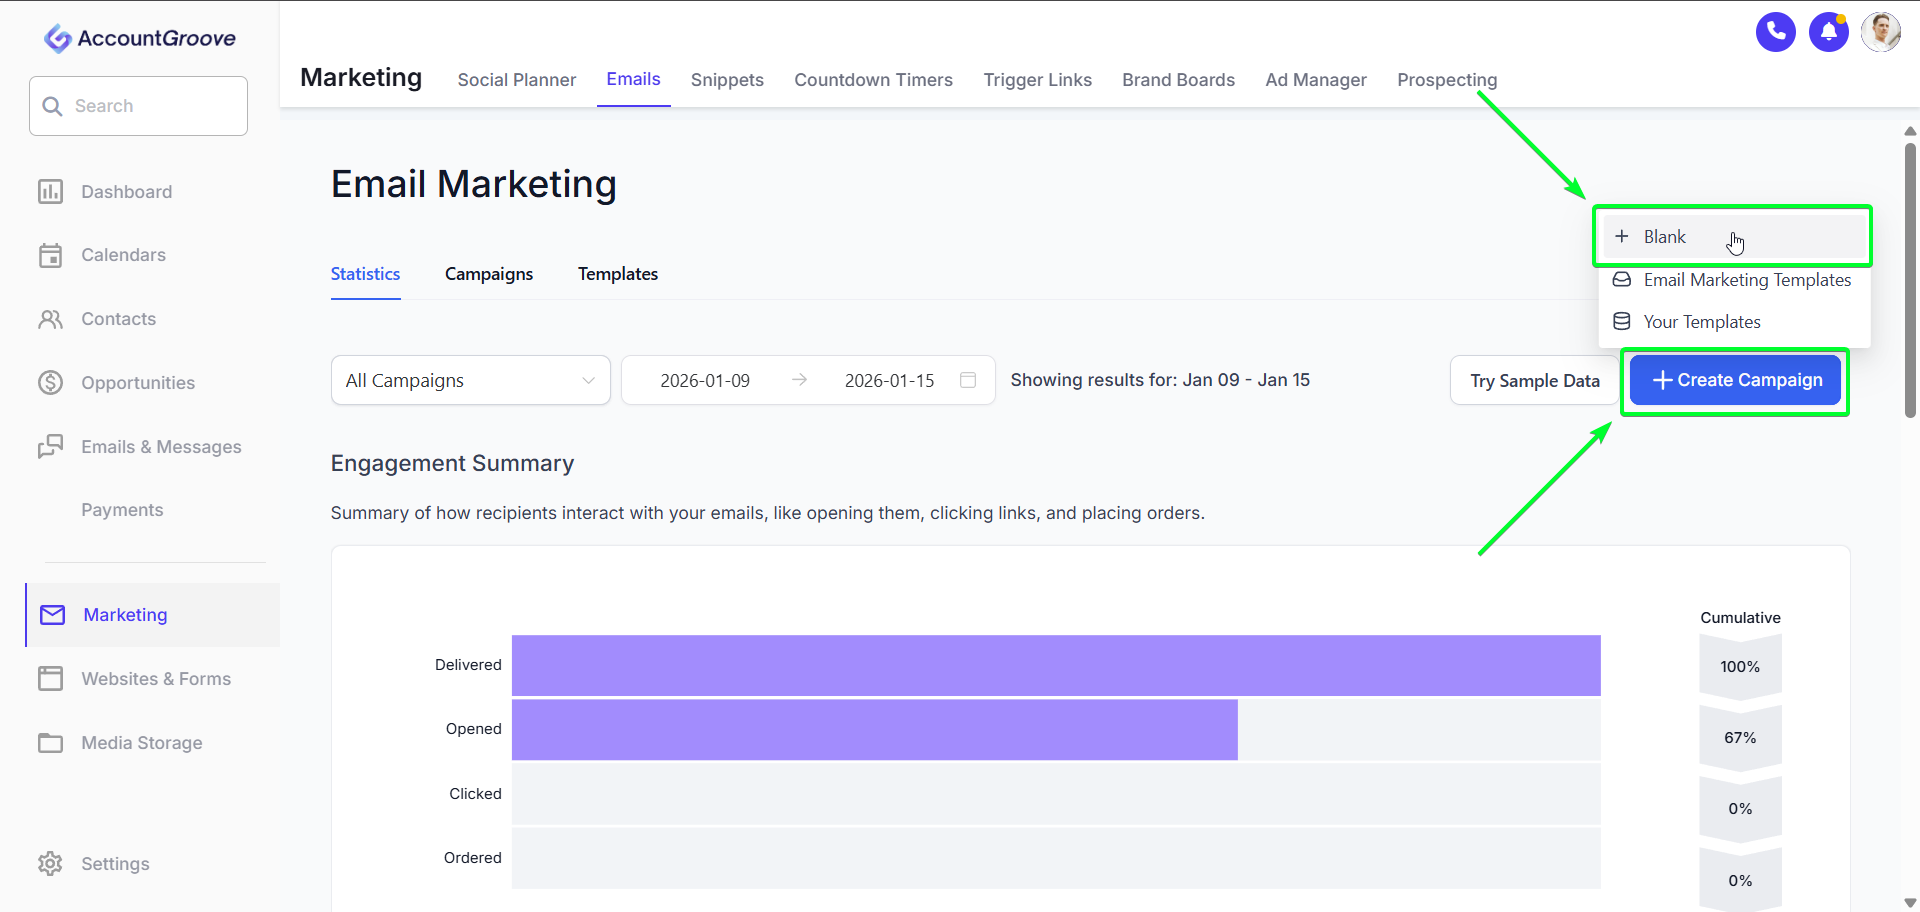
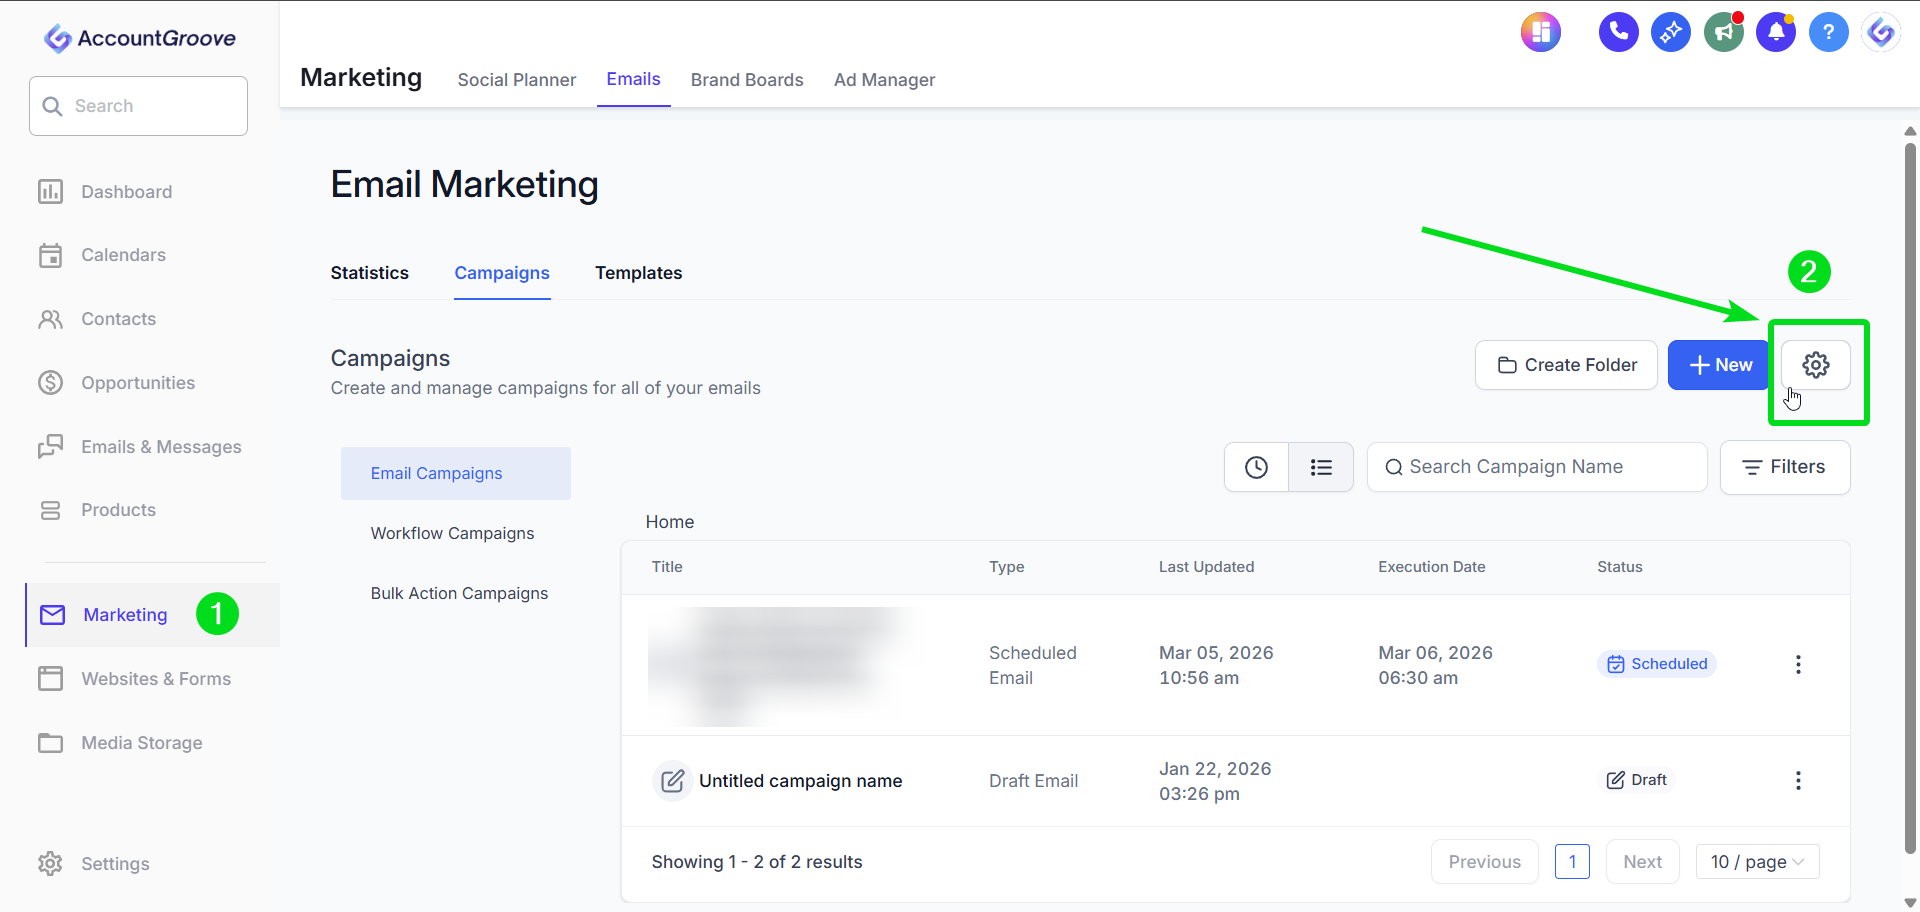
Step 1: Navigate to Email Marketing
- From the left hand navigation, click Marketing
- Select Email Marketing
- Click Create Campaign in the top right corner
This will start a new email campaign and open the email builder.
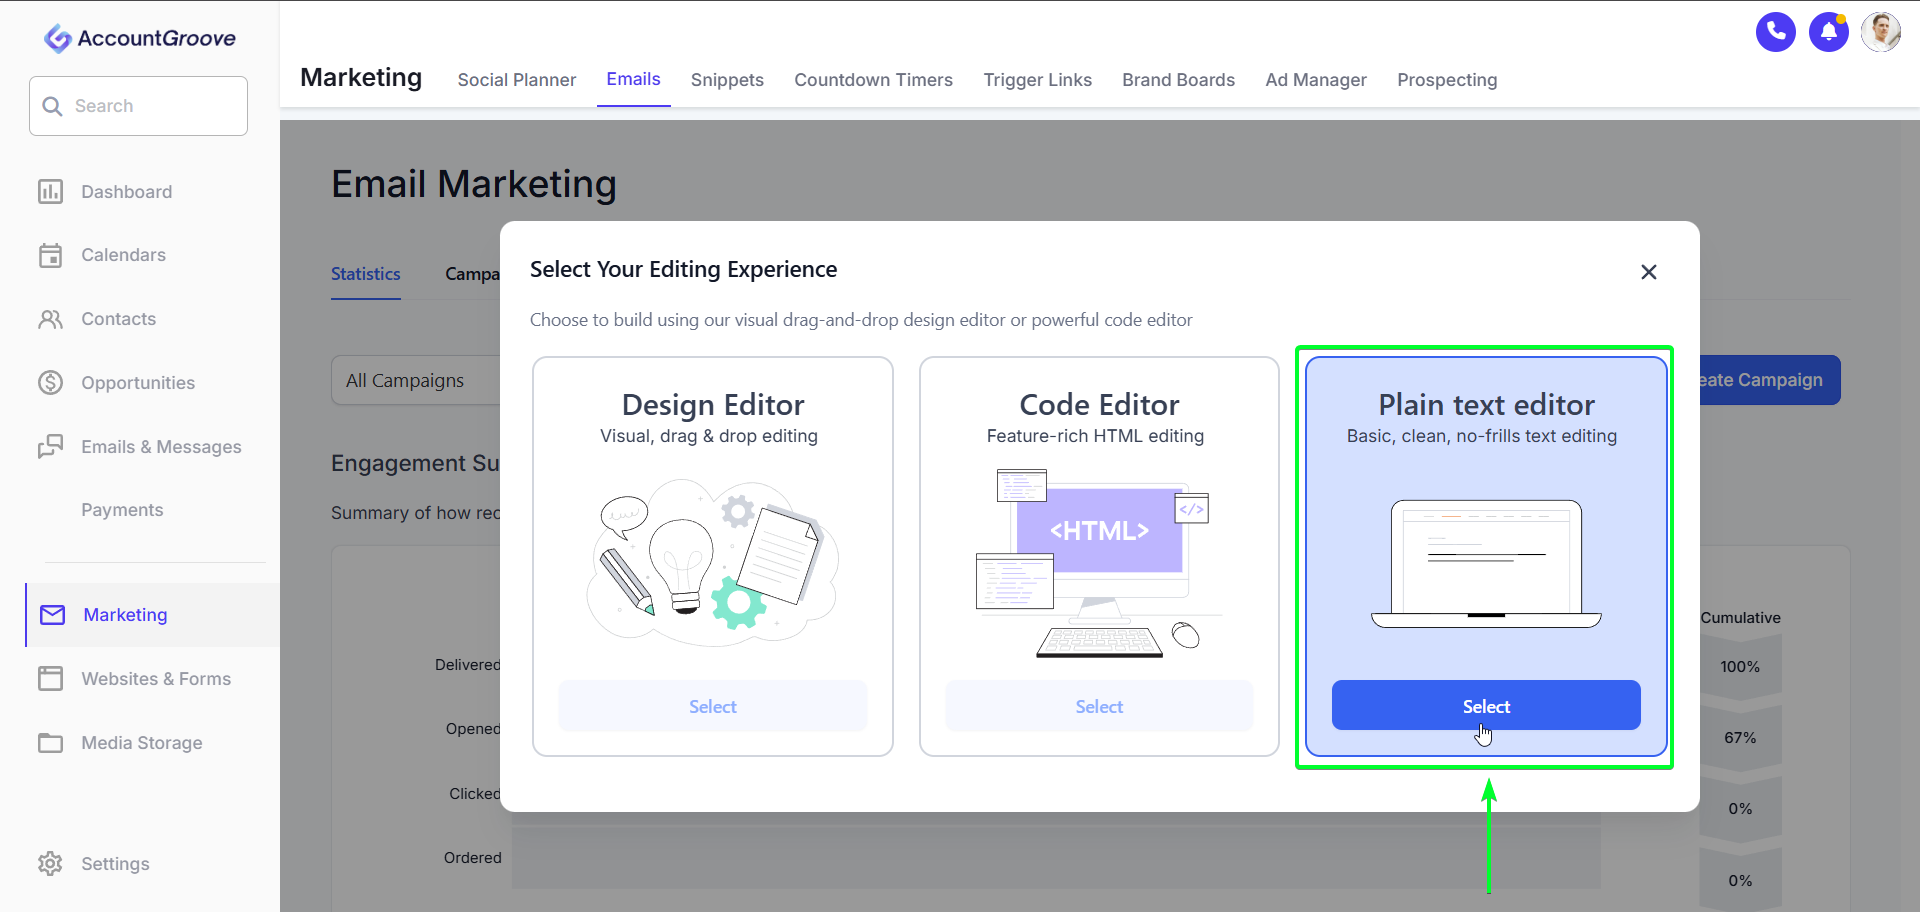
Step 2: Choose Your Email Editor
You’ll be prompted to select how you want to build your email:
-
Design Editor
Best for branded emails with images, buttons, and layout blocks.
-
Code Editor
For advanced users who want full HTML control.
-
Plain Text Editor
Recommended for simple messages and higher deliverability.
Select your preferred editor and click Continue.
Step 3: Create Your Email Content
Inside the editor:
- Edit the email title
- This is internal only and helps you identify the campaign later.

- Add your message body
- Write the content your recipients will see.
- You can use formatting tools, links, or personalization tokens if needed.
Tip: Use custom values like {{contact.first_name}} to dynamically personalize emails at scale.
- Click Save when finished.
Step 4: Send or Schedule the Email
After saving, choose how the email should be delivered:
-
Send Now
Sends the email immediately.
-
Schedule
Allows you to select a specific date and time.
When scheduling:
- Choose the send date
- Choose the send time
- Confirm your timezone is correct, if not edit in Business Settings
Step 5: Configure Sender Details
Complete the required sender information:
-
Sender Name
We recommend using your name or your business name for recognition.
Sender Email
You can use your main operation email so the contacts recognize the email address.
- Note the sent via will the subdomain protecting your main operation email.
-
Subject Line
Keep it clear, relevant, and concise to improve open rates.
Tip: Use custom values like {{contact.first_name}} to dynamically personalize emails at scale.
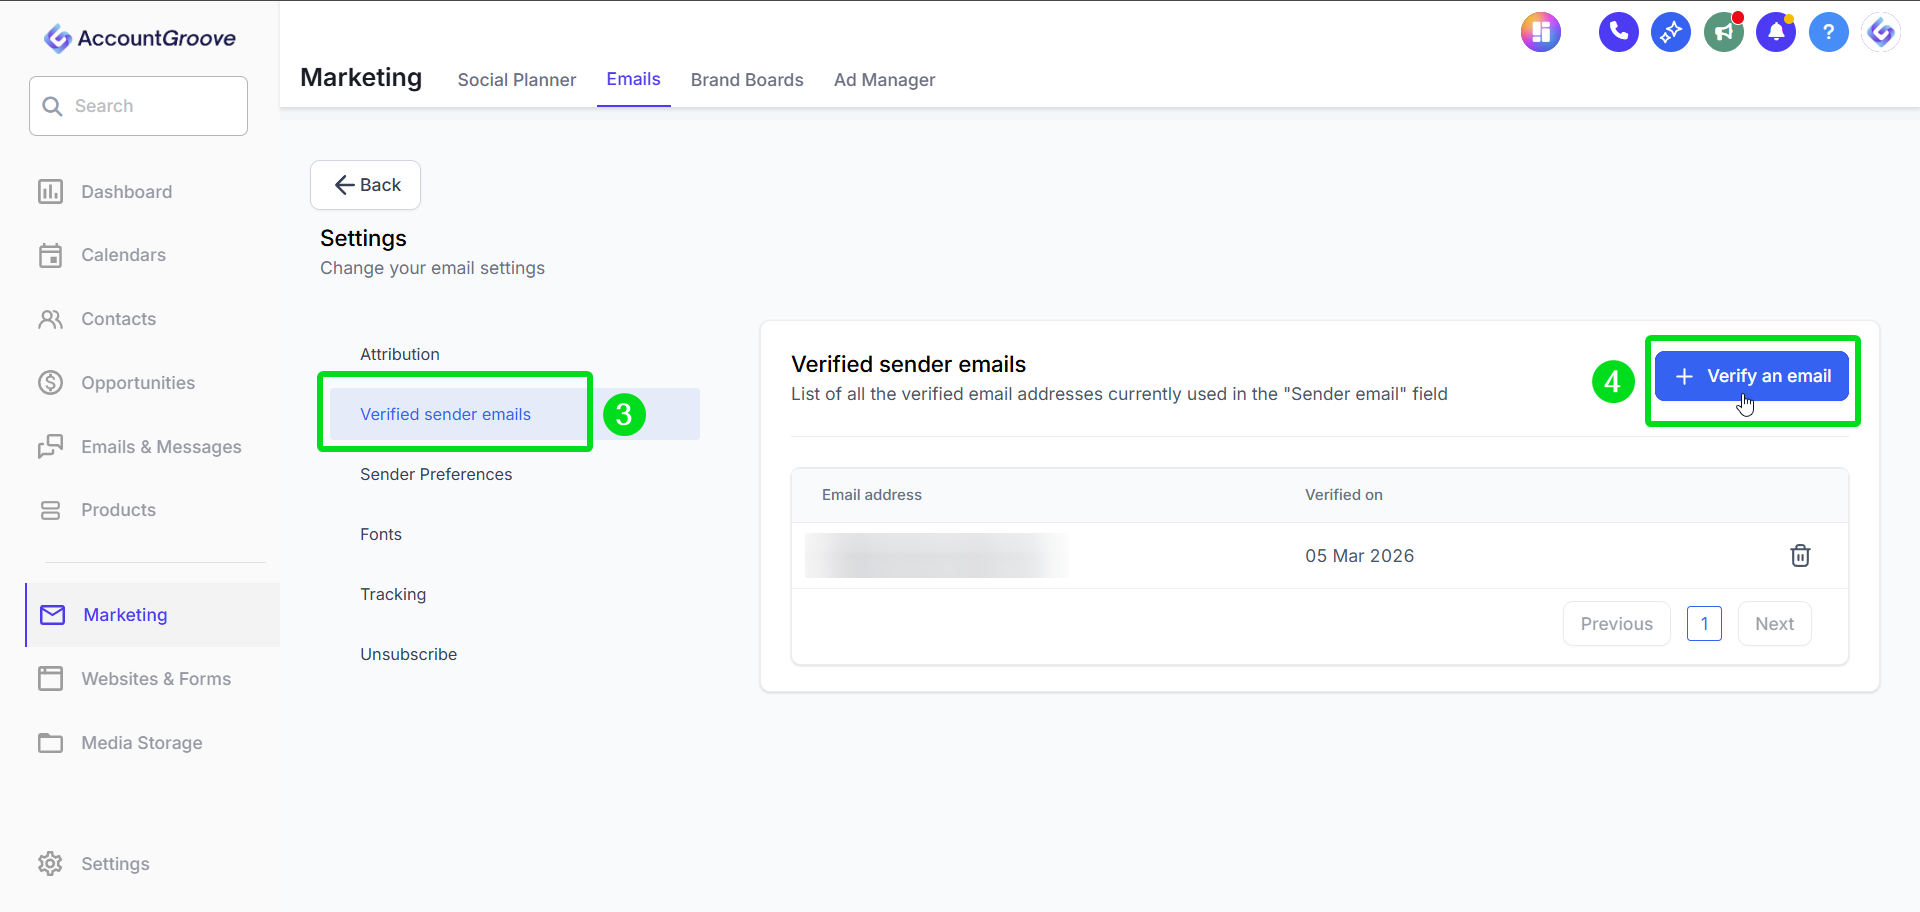
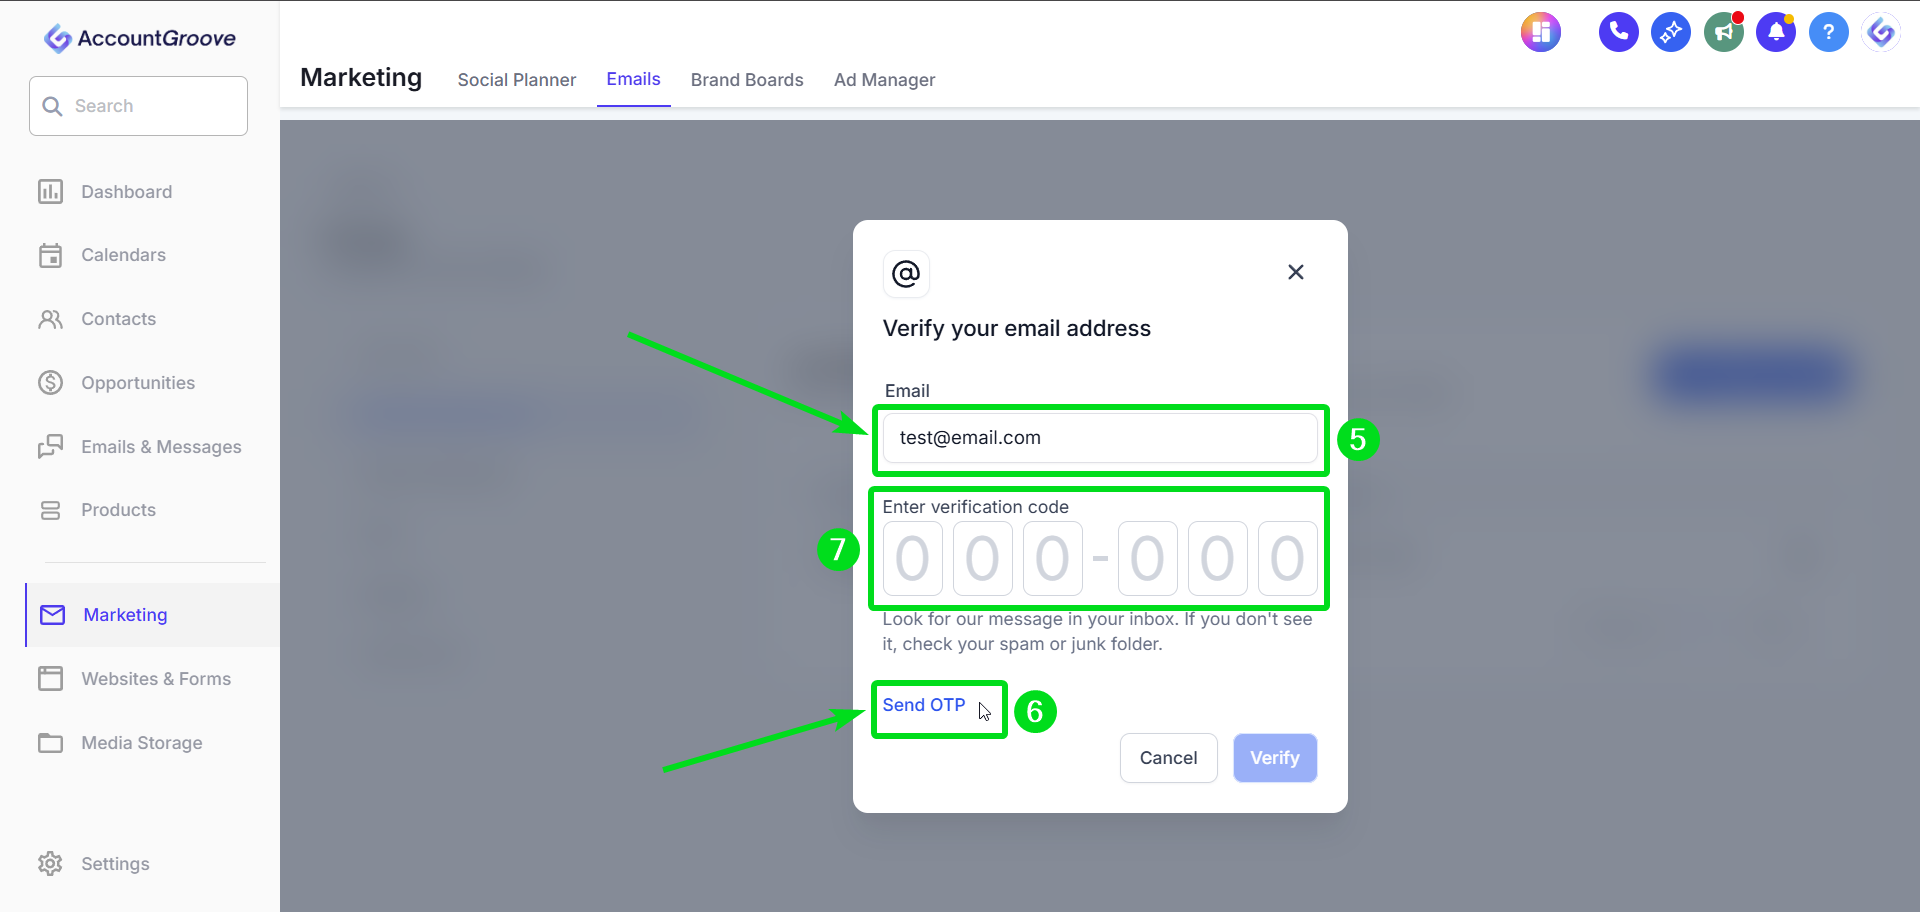
Important: Make sure that you that you verify your sender email to prevent emails from landing in spam.
Step 6: Choose Recipients
Next, select who should receive the email:
You can send to:
- All contacts
- Selected contacts
- Smart lists or saved segments
- See how to create Smart Lists here.
Advanced options allow you to:
- Exclude certain contacts
- Apply conditions (for example, only contacts with specific tags)
Review your recipient count before continuing.
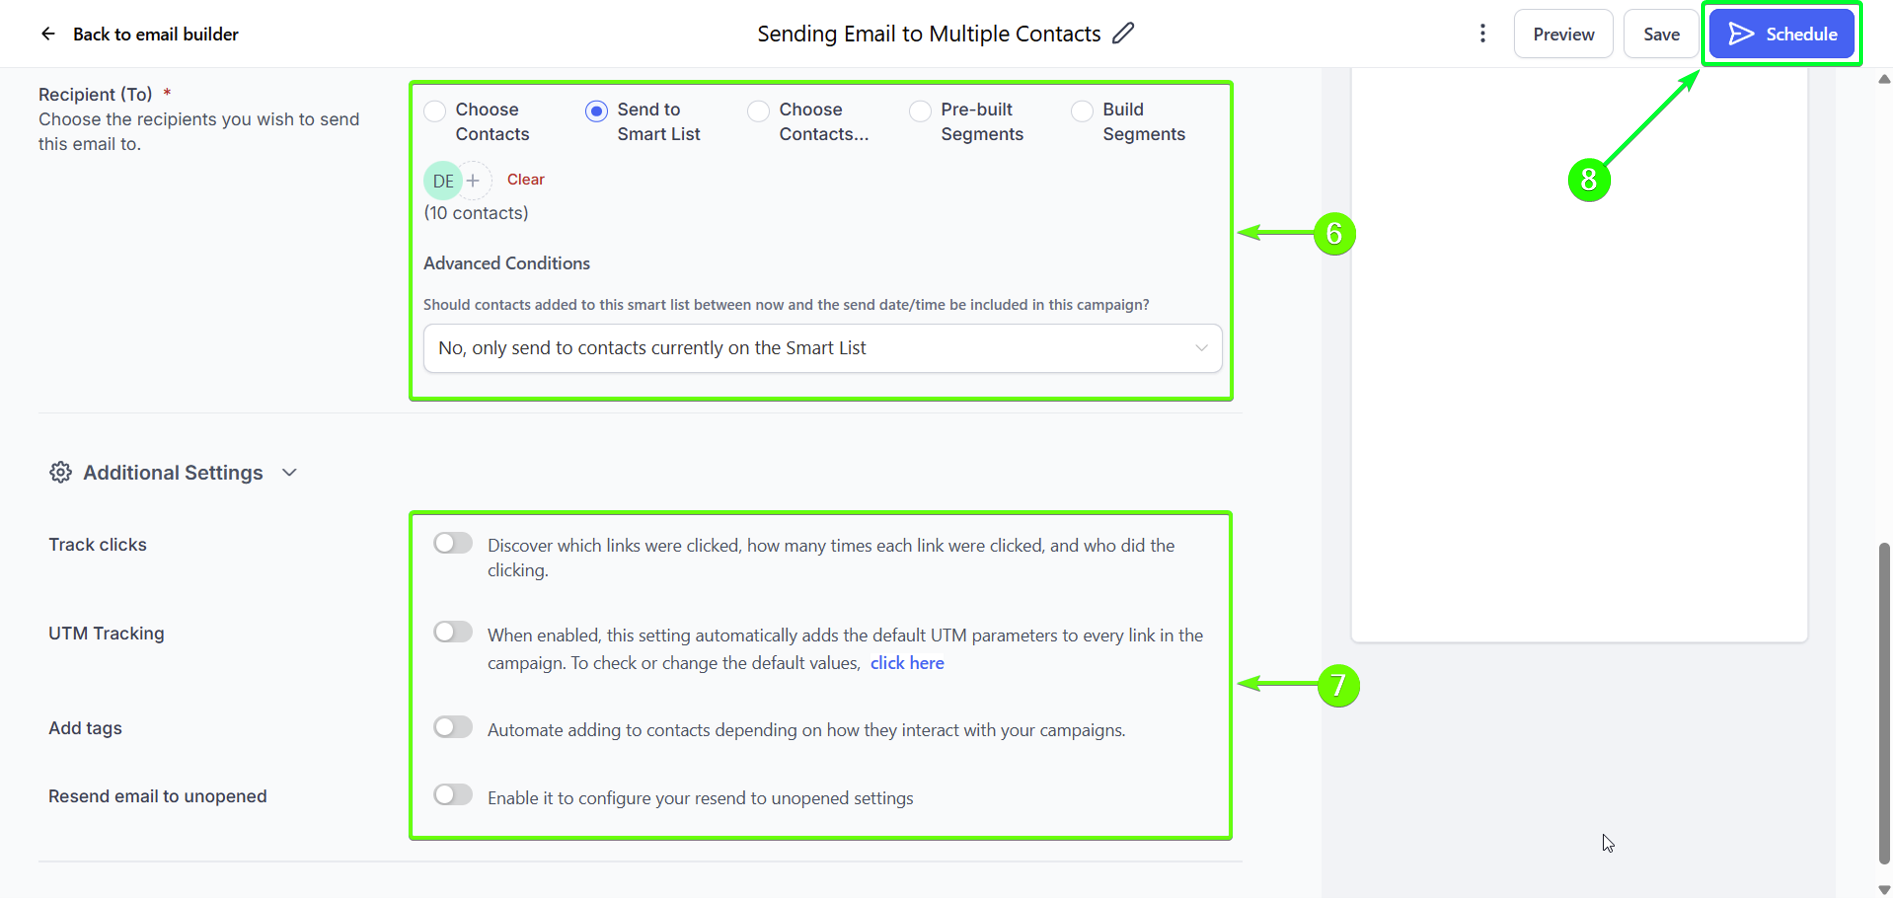
Step 7: Review Optional Settings
Before sending, you can optionally adjust:
-
Tracking
Enable open and click tracking.
-
Tags
Automatically apply tags to contacts who receive the email.
-
UTM Tracking
Useful for tracking traffic in analytics tools.
-
Exclusions
Prevent contacts from receiving duplicate or unwanted emails.
These settings are optional but helpful for reporting and follow up.
Step 8: Review and Send
- Review all settings and content
- Click Send or Schedule
- Confirm your selection
Your email will be sent according to your chosen settings.
Best Practices
- Use plain text emails for higher deliverability
- Always verify your sender domain before sending
- Test with a small list before large sends
- Avoid sending to cold or unengaged contacts