.png)
Turn Your Contact Form Into Booked Calls Automatically
How to Customize the New Lead to Call Booking Automation
One of the biggest advantages of using the AccountGroove CRM is that most of the automations your firm needs to take a lead from first contact to booked call are already built for you.
In most cases, your only job is to review and customize the messaging so it matches your tone of voice.
The workflows already include suggested copy, so this is usually a light review and update rather than building anything from scratch.
Step 1: Open the Automation (Only to Customize Messaging)
- Log into your AccountGroove account
- Navigate to Automations
- Open the New Lead to Call Booking workflow
- Click into the first tab to view the full automation flow
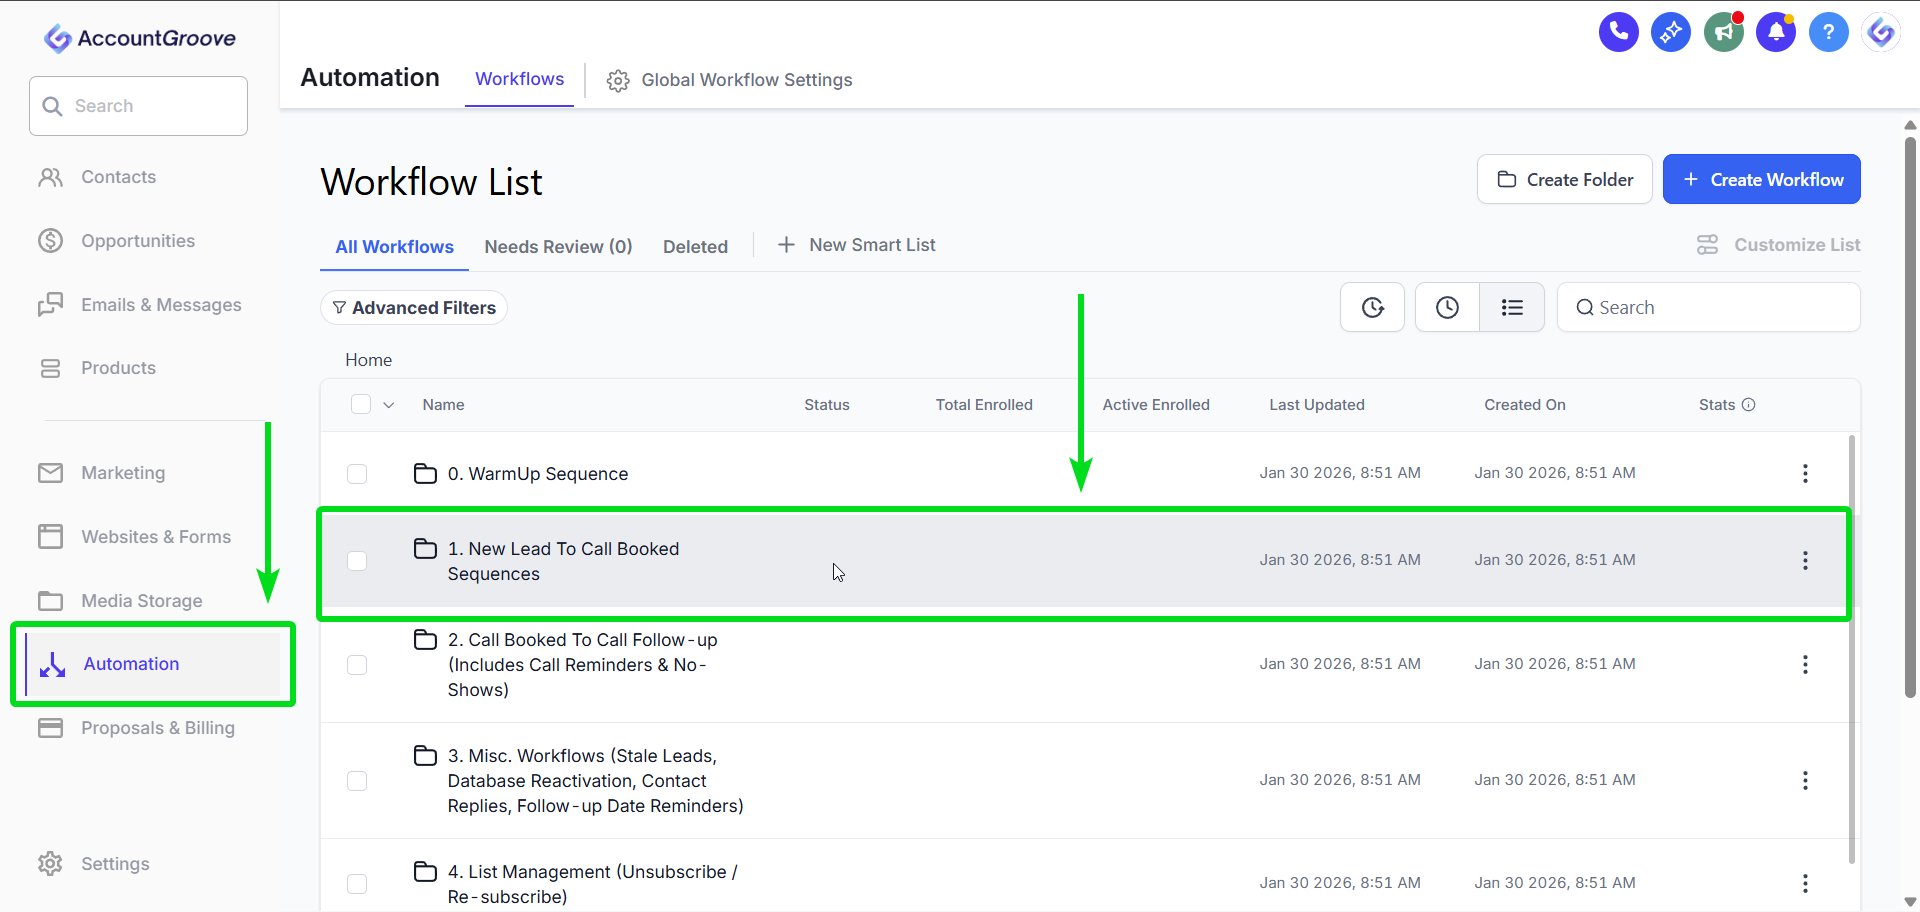
This view shows what happens after a lead fills out your form, including internal actions and outbound emails.

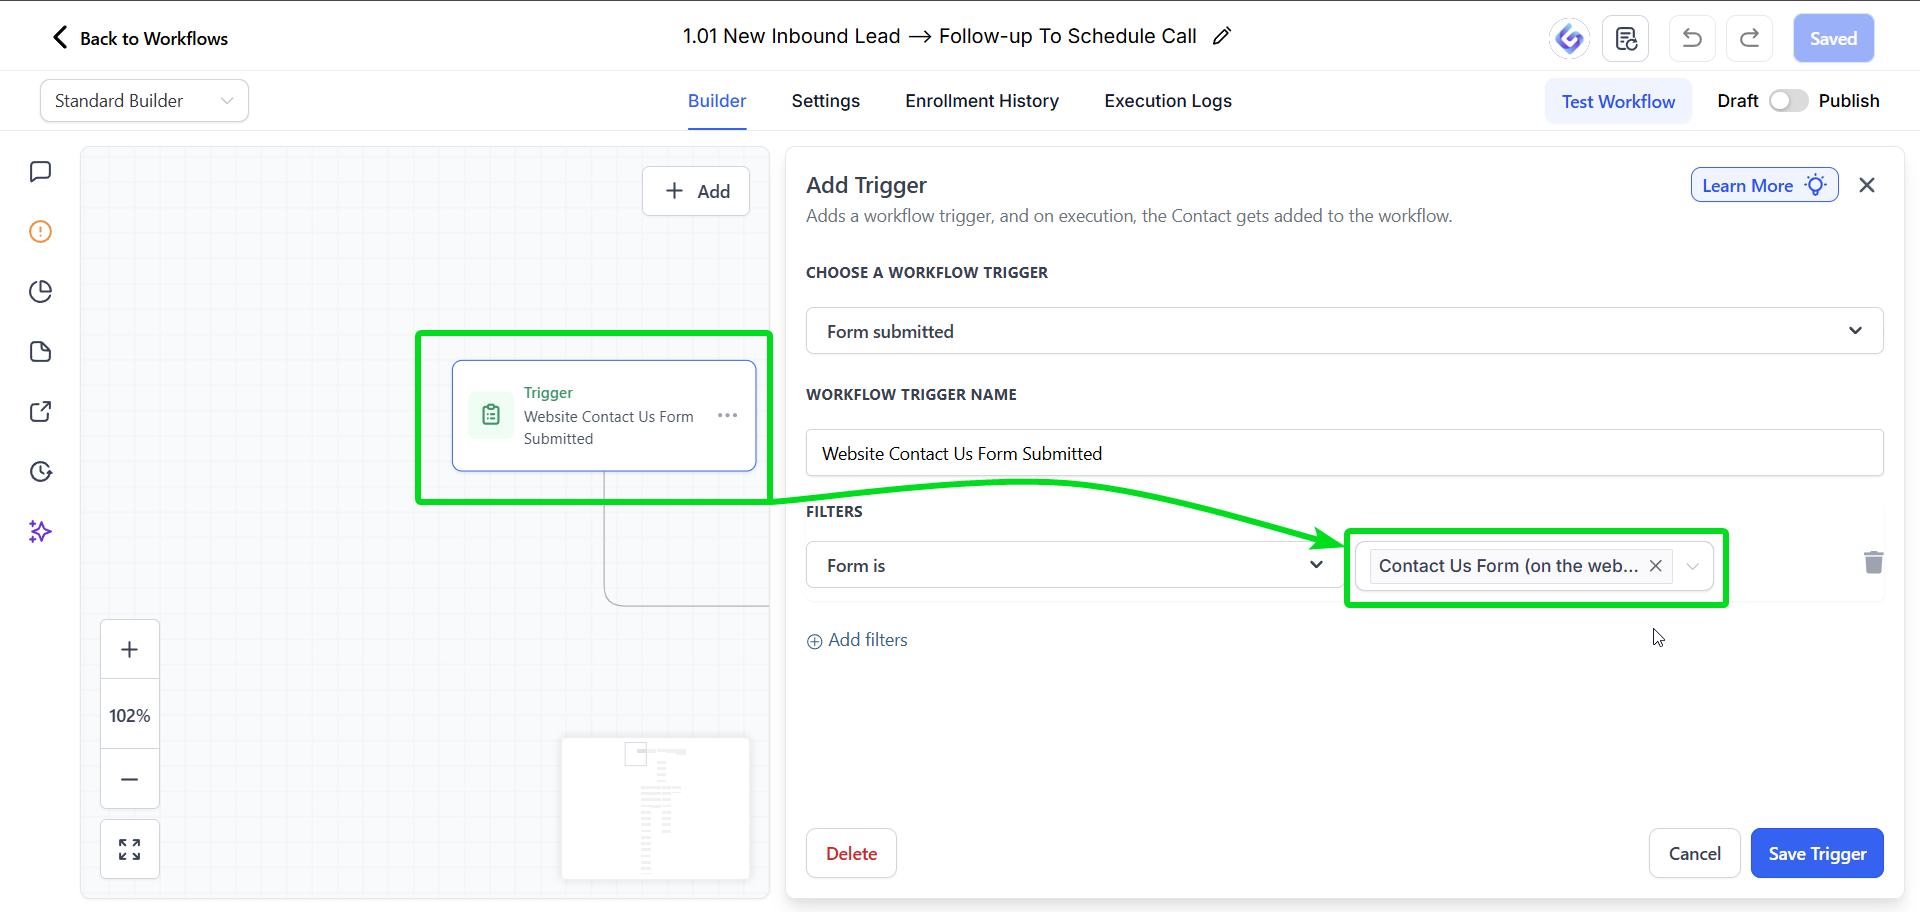
Step 2: Review the Trigger
- Confirm it is connected to your Contact Us form (set up earlier)
- Click Save if no changes are needed
This trigger fires when someone submits your website form.
Refer back to the Create a Form if you need a refreshers on how to customize this form.
Step 3: Understand the Initial Actions
After a form submission, the automation will:
- Assign the lead to a team member
- Automatically create an opportunity in your Lead to Sales pipeline
- Begin the email follow-up sequence
No changes are required here unless you want to adjust assignment rules.
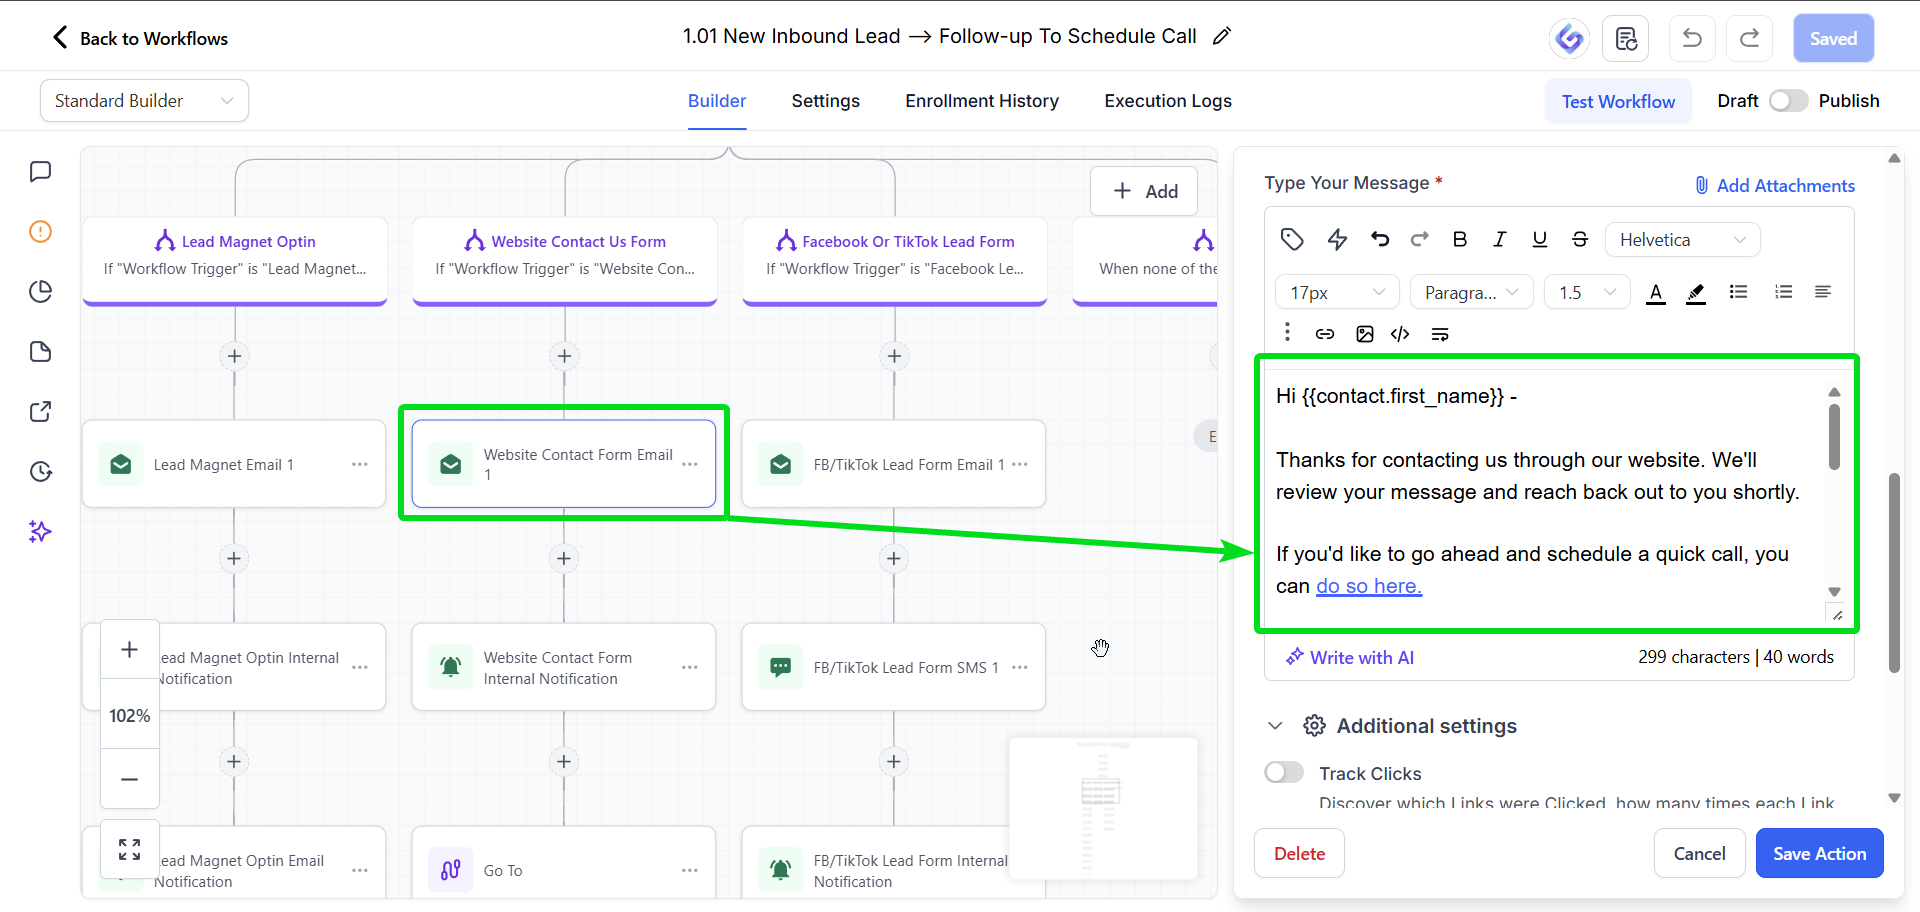
Step 4: Customize Email Messaging
Anywhere you see an email icon, you can customize messaging.
From Name and Email
These can remain blank. They automatically pull from your Personal and Business Settings.
Subject Line and Email Body
- Review the subject line and email copy
- Personalization fields like business name and first name auto-populate from the form
- Adjust wording if needed to match your voice
Repeat this for every email in the sequence.
Step 5: Update Your Calendar Link
Important: If you have updated the Custom Value for the Discovery Call this will automatically populate and you can skip this step. Learn more here:
If you would like to update the calendar link to a different calendar see below:
- Open each email that includes a call booking link
- Paste your calendar link directly into the URL field
- Save the action
This ensures leads are routed to the correct calendar when they click to book a call.
Repeat this for every email in the sequence.

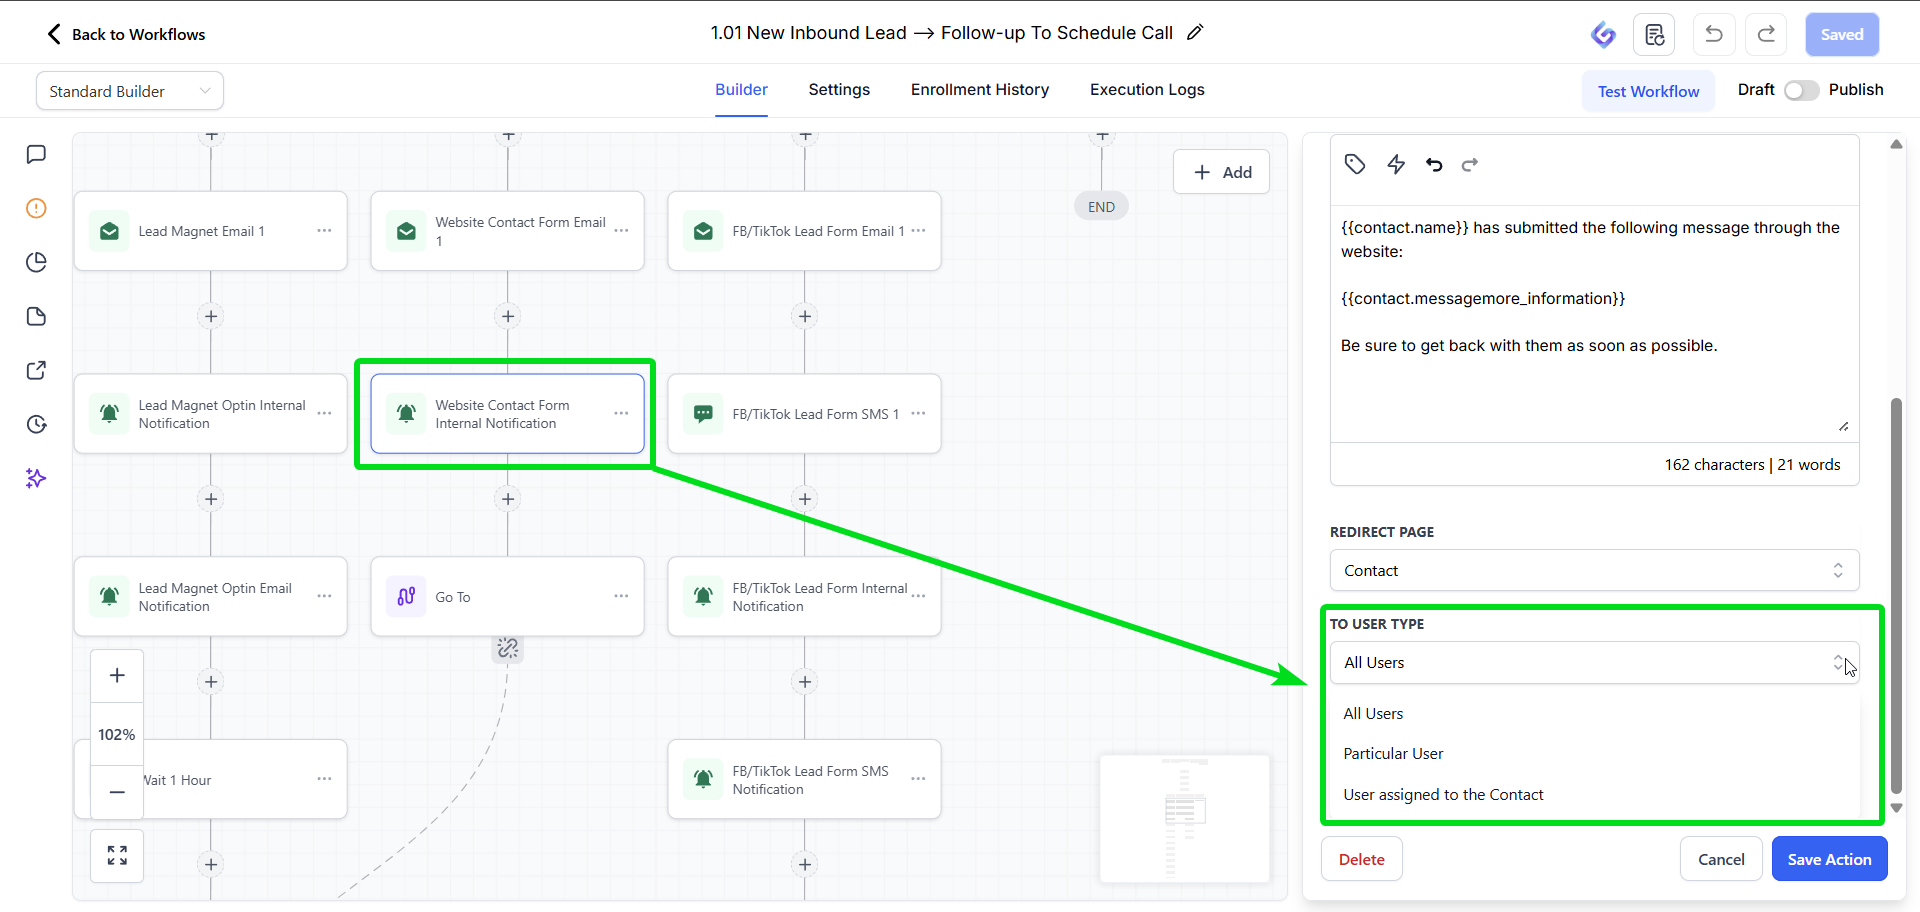
Step 6: Internal Notifications
The workflow includes an internal notification that alerts your team when a website contact form is submitted.
- Select the team member to add to your internal notifications
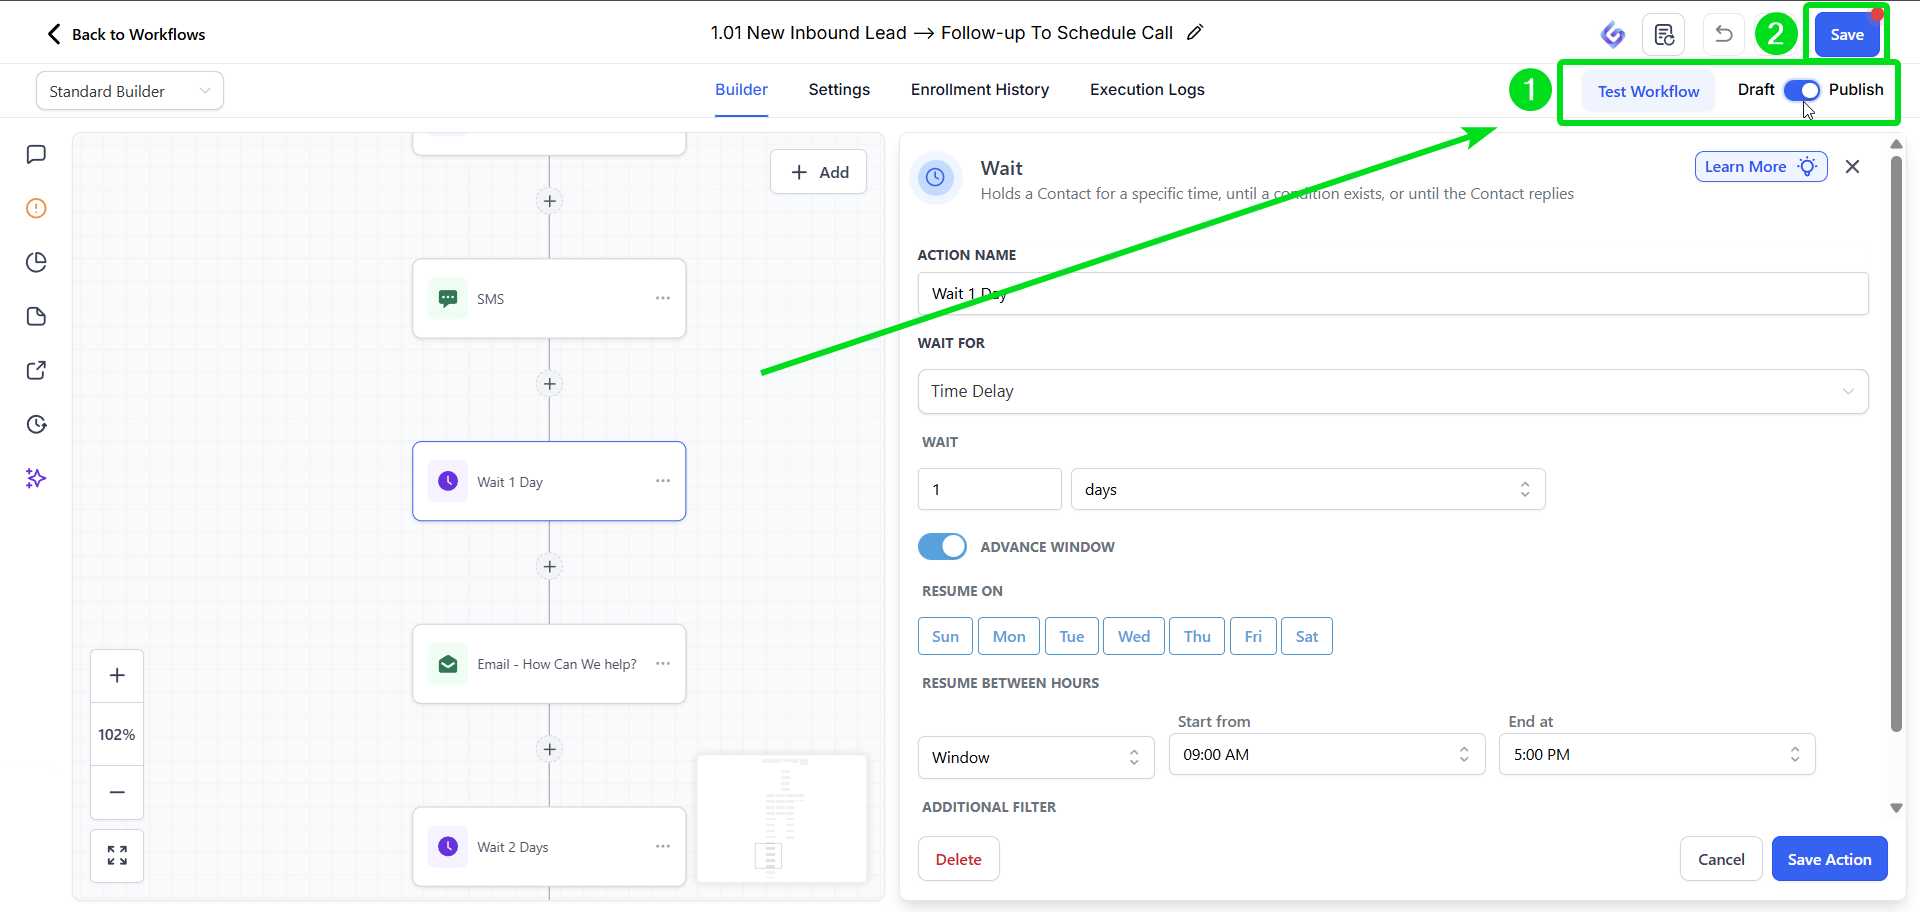
Step 7: Review the Full Follow-Up Sequence
Whether a lead comes from a contact form or a lead magnet, they will enter the same reminder sequence designed to encourage booking a call.
- Emails are spaced out with wait periods
- You can adjust timing if desired
- The goal is consistent, helpful nudges to book a call
- To adjust the timing, click the clock card and update how long the system waits before the next contact step.

NOTE: If SMS is included and you do not yet have a phone number set up, leave it as is. The workflow will skip it automatically, and it keeps the option open for future use.
Step 8: Test the Workflow
Testing is strongly recommended.
- Create a test contact using your own email address
- Run the workflow test
- The system will send all emails immediately, ignoring wait times
Review each email and confirm:
- Messaging looks correct
- Calendar links work properly
- Personalization fields populate correctly
IMPORTANT: When testing your workflow on a form, make sure that you have submitted a test form first. Then when you go to Test Workflow select the same contact that you used to submit your form.
Final Check
Once testing is complete and everything looks good:
- Save the workflow
- Publish or activate it
Your automation is now ready to capture leads, prompt call bookings, and support consistent conversion without manual follow-up.